Yarn choice for Andean backstrap weaving

This month a group of more than 50 of us are taking part in Abby Franquemont’s first online Andean backstrap weaving class through Franquemont University, her online teaching platform. She has been teaching this style of weaving since she was a child, for more than 40 years, but has only recently figured out a way to translate showing this very hands-on skill via online classes while maintaining cultural context.

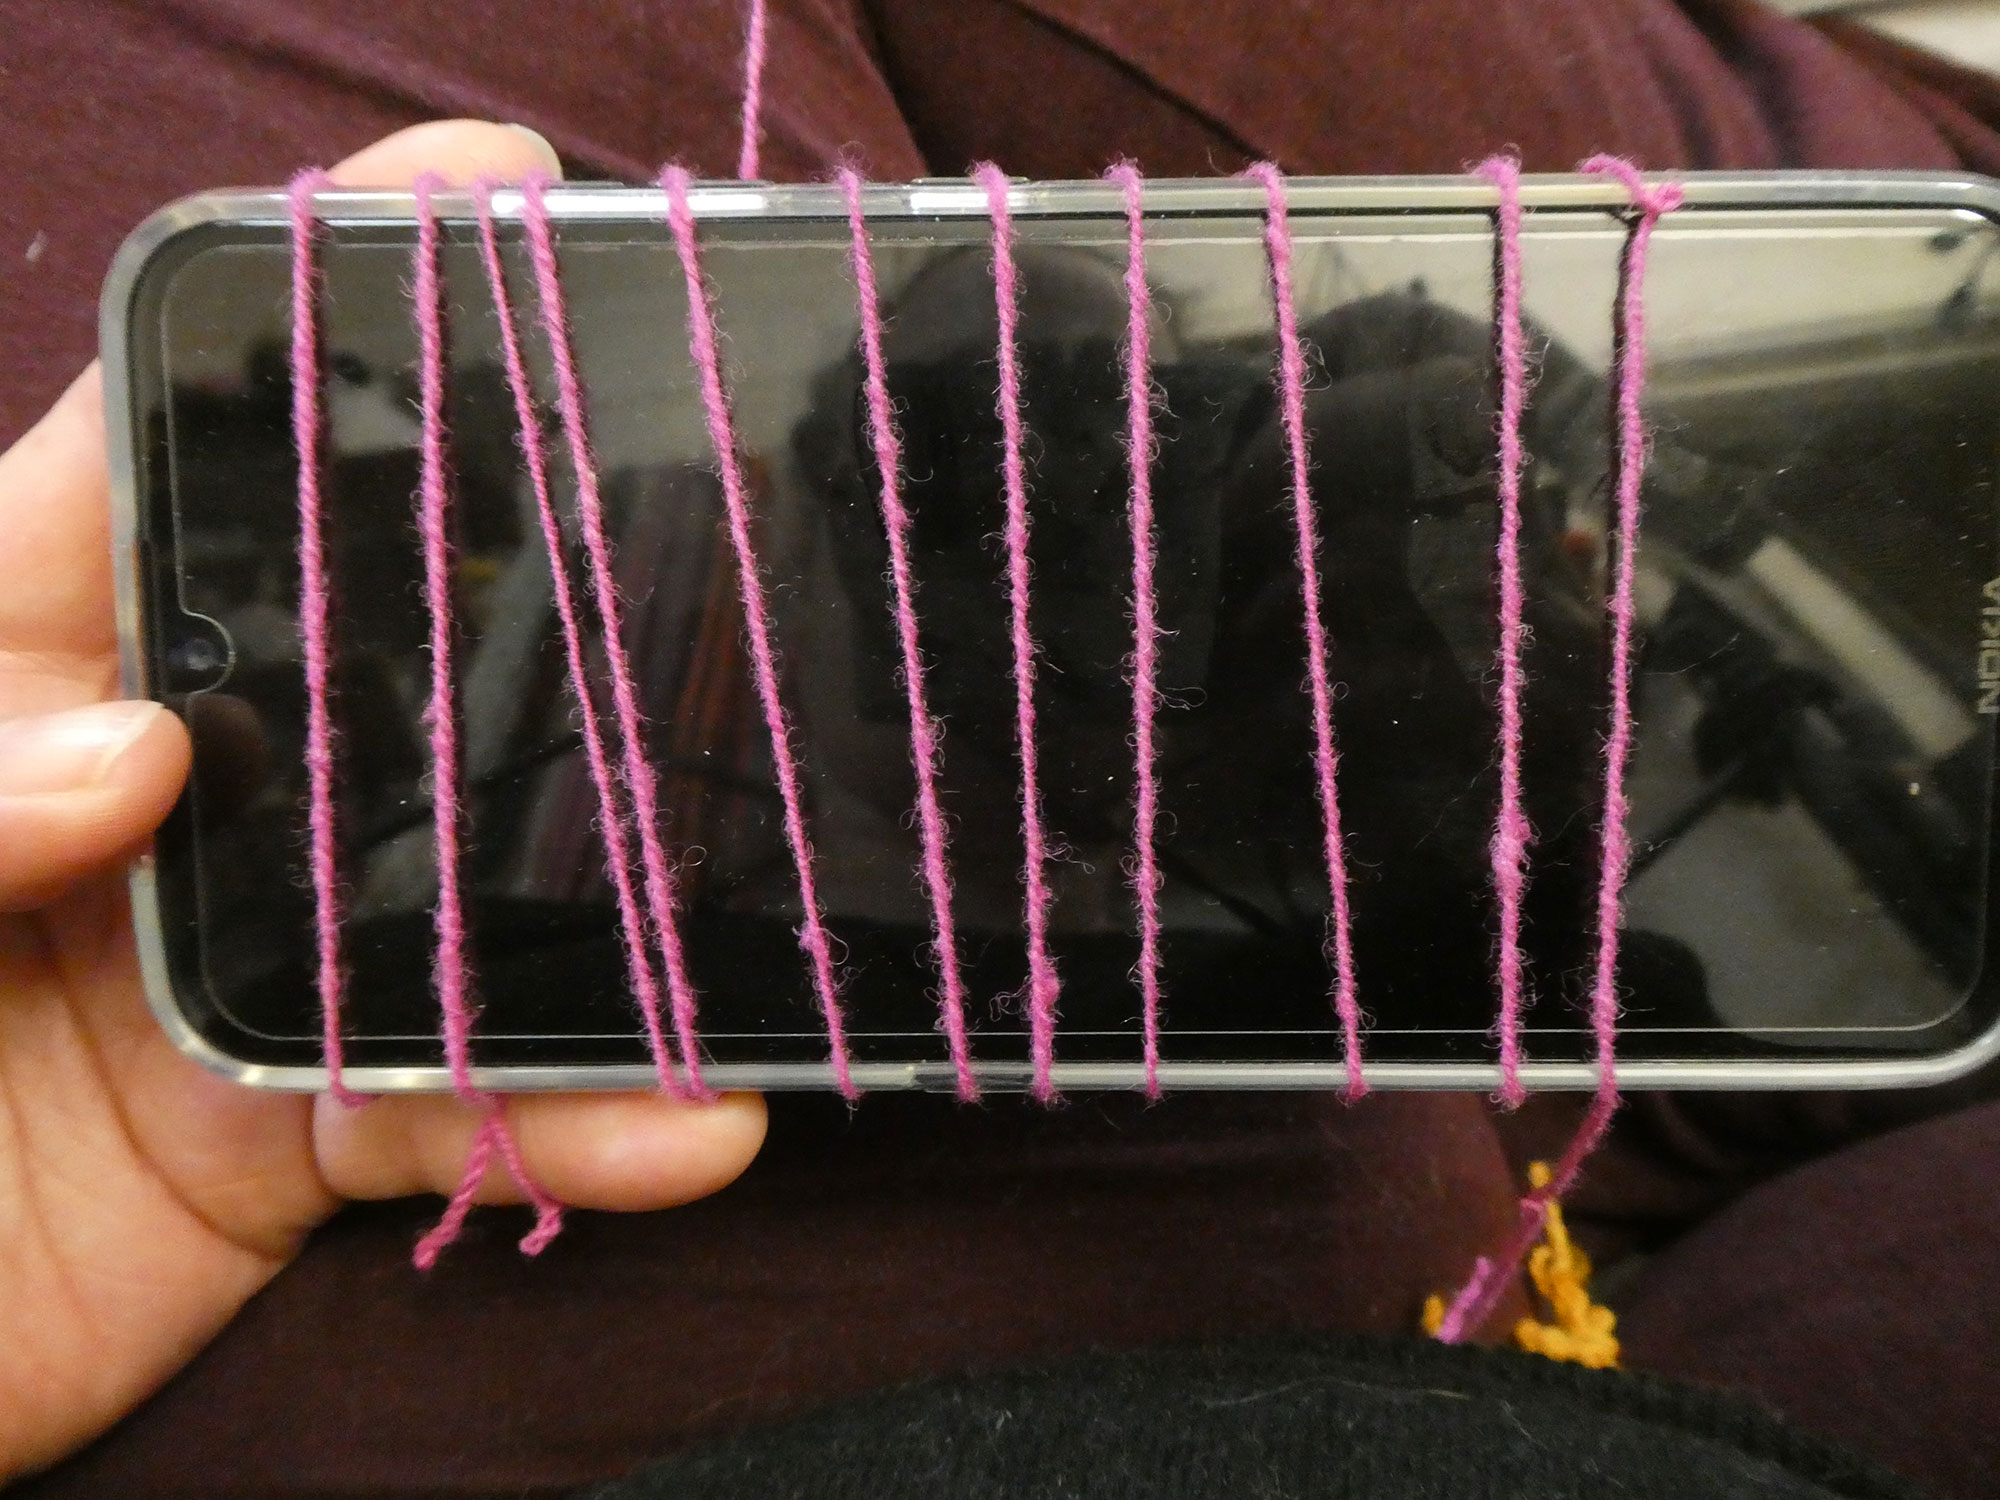
The biggest initial hurdle was supplying the warps. Having a properly wound warp of the correct material is essential to your success in this sort of weaving, and when taught in Peru beginners learn to operate their looms and weave basic patterns long before they learn to wind their own warps. Being taught in the traditional method, we had to do this too. So, for these classes to succeed, we all needed to have our warps wound by an experienced weaver. The Young Weavers Group at Away Riqcharicheq in Chinchero took on this mammoth task for us, and wound 300 beginner warps, which were shipped in bulk to the US, UK, and EU to then be sent on to their final homes.

We are now at the stage of the of learning where we can operate our looms, we can weave one or two basic patterns, can tie our illawas, and are ready to learn how to wind our own warps. As I am one of Abby’s adjunct professors, I got to start this course a little early so I’m far enough ahead of my classmates to be able to answer questions as they arise. This is good for my learning too, as part of learning to weave in this style is learning to teach those who aren’t as advanced as you; children teach younger children, there are no formal classroom lessons with adult teachers.

One of the questions that has come up repeatedly is ‘what is the best yarn to make my warps from?’ The answer is simple, and doesn’t change. Khaitu. Andean weaving yarn handspun with the characteristics needed, which pretty much boil down to twist. A lot of twist. High singles twist, and incredibly unbelievably (to a western spinner) high ply twist, far past the point of twist stasis. The question that follows is normally ‘what if I can’t spin my own yarn, what yarn can I buy that will do the job?’. The answer is none. They are all shit. There are no commercially available yarns that have enough twist to work. However, all is not lost. While you can’t go out and buy yarn and immediately wind a warp, there are yarns that you can buy and add extra twist to on a spindle, wheel, or e-spinner, which will make adequate warps. Not good warps, but adequate.

I’ve been doing some experimenting so you don’t have to. Here are my results so far. First come the yarns with no added twist, as they were bought. Now I knew these wouldn’t work before I tried them, I trust Abby, but one of the most oft-uttered phrases in her classes are ‘what happened when you tried?’. Well, I tried so you don’t have to.

Knitpicks palette.

This was far stretchier and more elastic than the handspun yarn I’ve been using thus far, and it was surprisingly hard to wind the warp maintaining even tension and keeping the knots lined up. After winding, I set up to tie my illawa, and could already see and feel the yarn beginning to fuzz and shed.

As I started weaving, each pick became harder as there was more buildup of lint on the illawa, between the khallwa, and pretty much all over the part of the warp I was using, making getting a clean shed a challenge, and meaning I had to strum the warp and pick bits off that were getting in the way. With every beat I was pushing excess fluff into the pattern, obscuring it and making it look messy.

I gave up after this much as clearing the shed each time was getting to be too much work.

Rating: Terrible, 1/10. At least it didn’t break.

Sock yarn

This was from my stash of sock yarn leftovers, so is from a variety of brands. I believe it was all 20-25% nylon with the rest being wool, some merino, some not, spun with a moderately high twist for commercial knitting yarn.

While winding the warp this yarn was also noticeably more elastic that I was used to, although not as bad as the knitpicks.

I managed to get the illawa tied and the first few picks woven without any issue, although it was already apparent that the threads settled into each other in the way the proper yarn doesn’t, making the patterns less distinct.

After a few more picks, the yarn was beginning to fuzz and shed, and lint was building up around the illawa and khallwa. The tension also felt strange, as the different yarns I used had different levels of stretch.

I managed a couple more pattern repeats than with the palette, but couldn’t have made a full band as there was just too much fuzz buildup, and the pattern didn’t even look that good.

Rating: 2/10

Yeoman Yarns Brittany 2 ply cotton.

This is the yarn I weave my teatowels out of, it comes in cones of 400g/3380m, and is a good budget price yarn for floor loom weaving. I’m sure results would be similar with most cotton weaving yarns.

Warping with this was difficult in the opposite way to the wool yarns; it had far less stretch than I was used to, so getting the knots lined up was hard in a different way. It’s also considerably finer than the wools, so would take a lot longer to weave a whole band from it.

While tying the illawa and getting started weaving, there was no fuzzing or shedding noticeable. However it didn’t feel right. The lack of elasticity meant that the small body movements I do to adjust my tension didn’t work in the same way as with wool, and it just wasn’t enjoyable to use.

I did manage a whole pattern repeat before stopping and thinking I would work on it another time, which I might, but I really didn’t like weaving with it, and I’m not convinced it’ll be strong enough to withstand weaving a whole band without a break.

Rating: 3/10 No shedding or grabby threads to worry about, fairly good pattern definition, but just really not enjoyable to work with.

Now we move on to yarns with added twist. How much twist to add? Well, that is something you’ll need to decide for yourself. The less twist you add, the closer the yarns will be to the ones above, with lint and fluff sticking your threads together and making it hard to weave and your patterns not show up as well. The more you add, the harder it is to wrangle the yarn during warping, and the more the finished band biases.

Rowan Scottish Tweed 4 Ply

Once I’d added some twist, it was increasingly apparent that this is an incredibly unevenly spun yarn, with lots of slubby bits. The twist was collecting in the thinner areas making me concerned they would break, and not enough twist was getting to the thicker areas. I didn’t even bother trying to add this to a warp as it would have ended in tears.

Rating: 0/10 Useless.

JaggerSpun Heather 3/8, Knitpicks Palette, Jamieson & Smith 2ply Jumper Weight

When twist is added, these yarns work out close enough to the same thickness that they work together, so I used them in the same warp so I could get the colours I wanted. They all have similar enough characteristics that grouping them together seems fair.

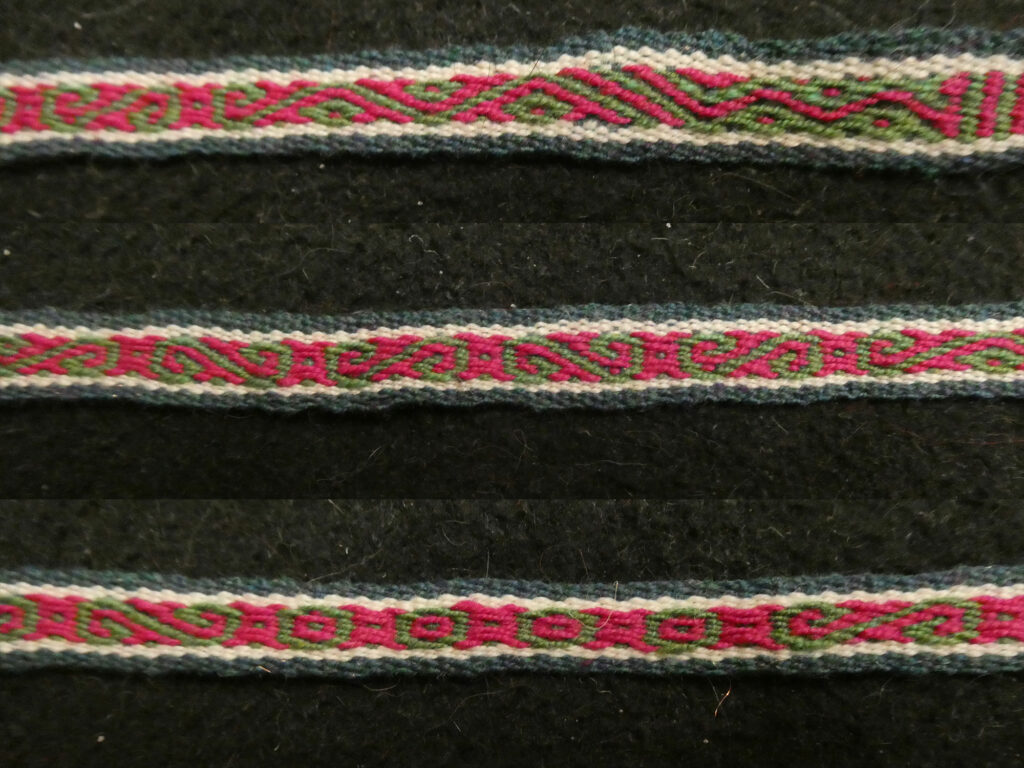
With a moderate amount of added twist the yarns are easy enough to manage during warping, and can manage a metre long band without fuzzing that stops the threads moving as they should, although there is a little buildup on the illawa by the end of the band. However the pattern definition isn’t great.

With higher added twist the yarns really want to twist back on themselves, so warping is a little more of a challenge, and the final band is fairly twisty, but the pattern is more distinct.

Rating: 6/10 Adequate

Harrisville Designs 2-ply Shetland

This is the yarn that fellow adjunct professor Cat uses for her beginner warps. It is similar to the yarns I tested above. I didn’t test warping with it as Cat sent me ready-wound warps, but on the weaving front it’s very similar, no problems with a clear shed but a little fuzz on the illawa by the end of the warp, and fairly good pattern definition.


Rating: 7/10


Handspun

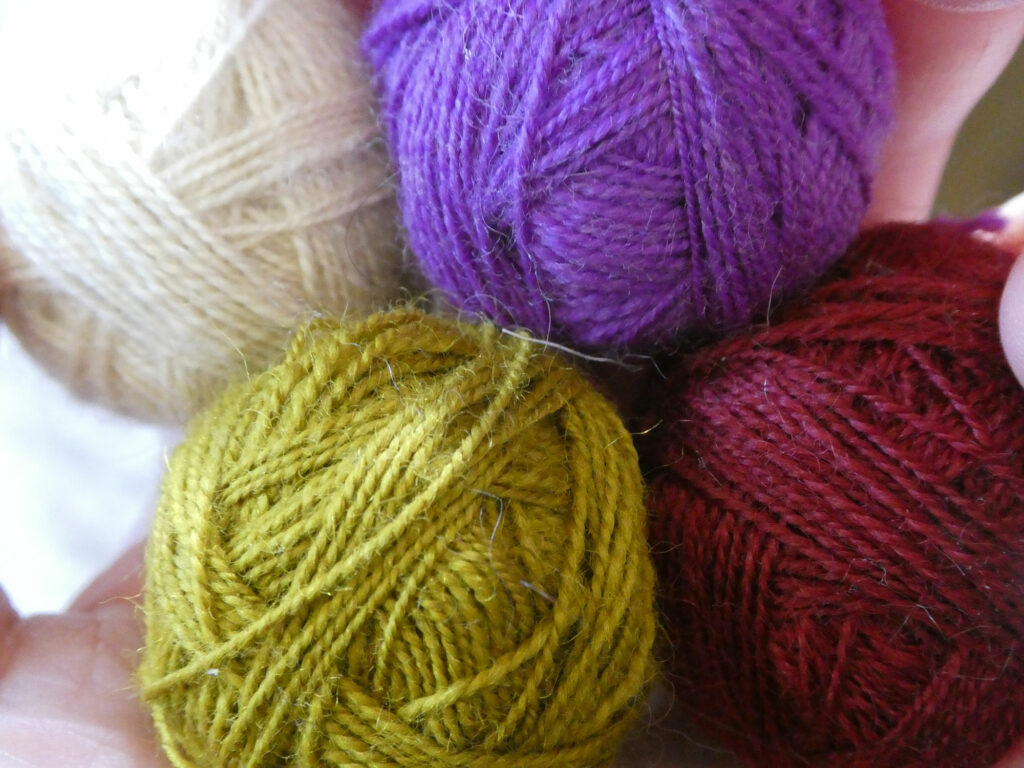
After trying the commercial yarns above and realising they weren’t as good as they could be, I began thinking ‘I wonder if I can buy a yarn that is a little finer, and has more singles twist, and…’ then realised that this is why I spin! When I want a yarn with certain characteristics, I make that yarn.

I made this video to show how I spin this sort of yarn on an espinner. I use a Daedalus Falcon, which is the fastest e-spinner on the market. If I didn’t have this, I’d rather do it on a spindle (ideally an Andean pushka, as unsurprisingly, the tools designed to make this sort of yarn do it best!) as using any other wheel would be very slow.

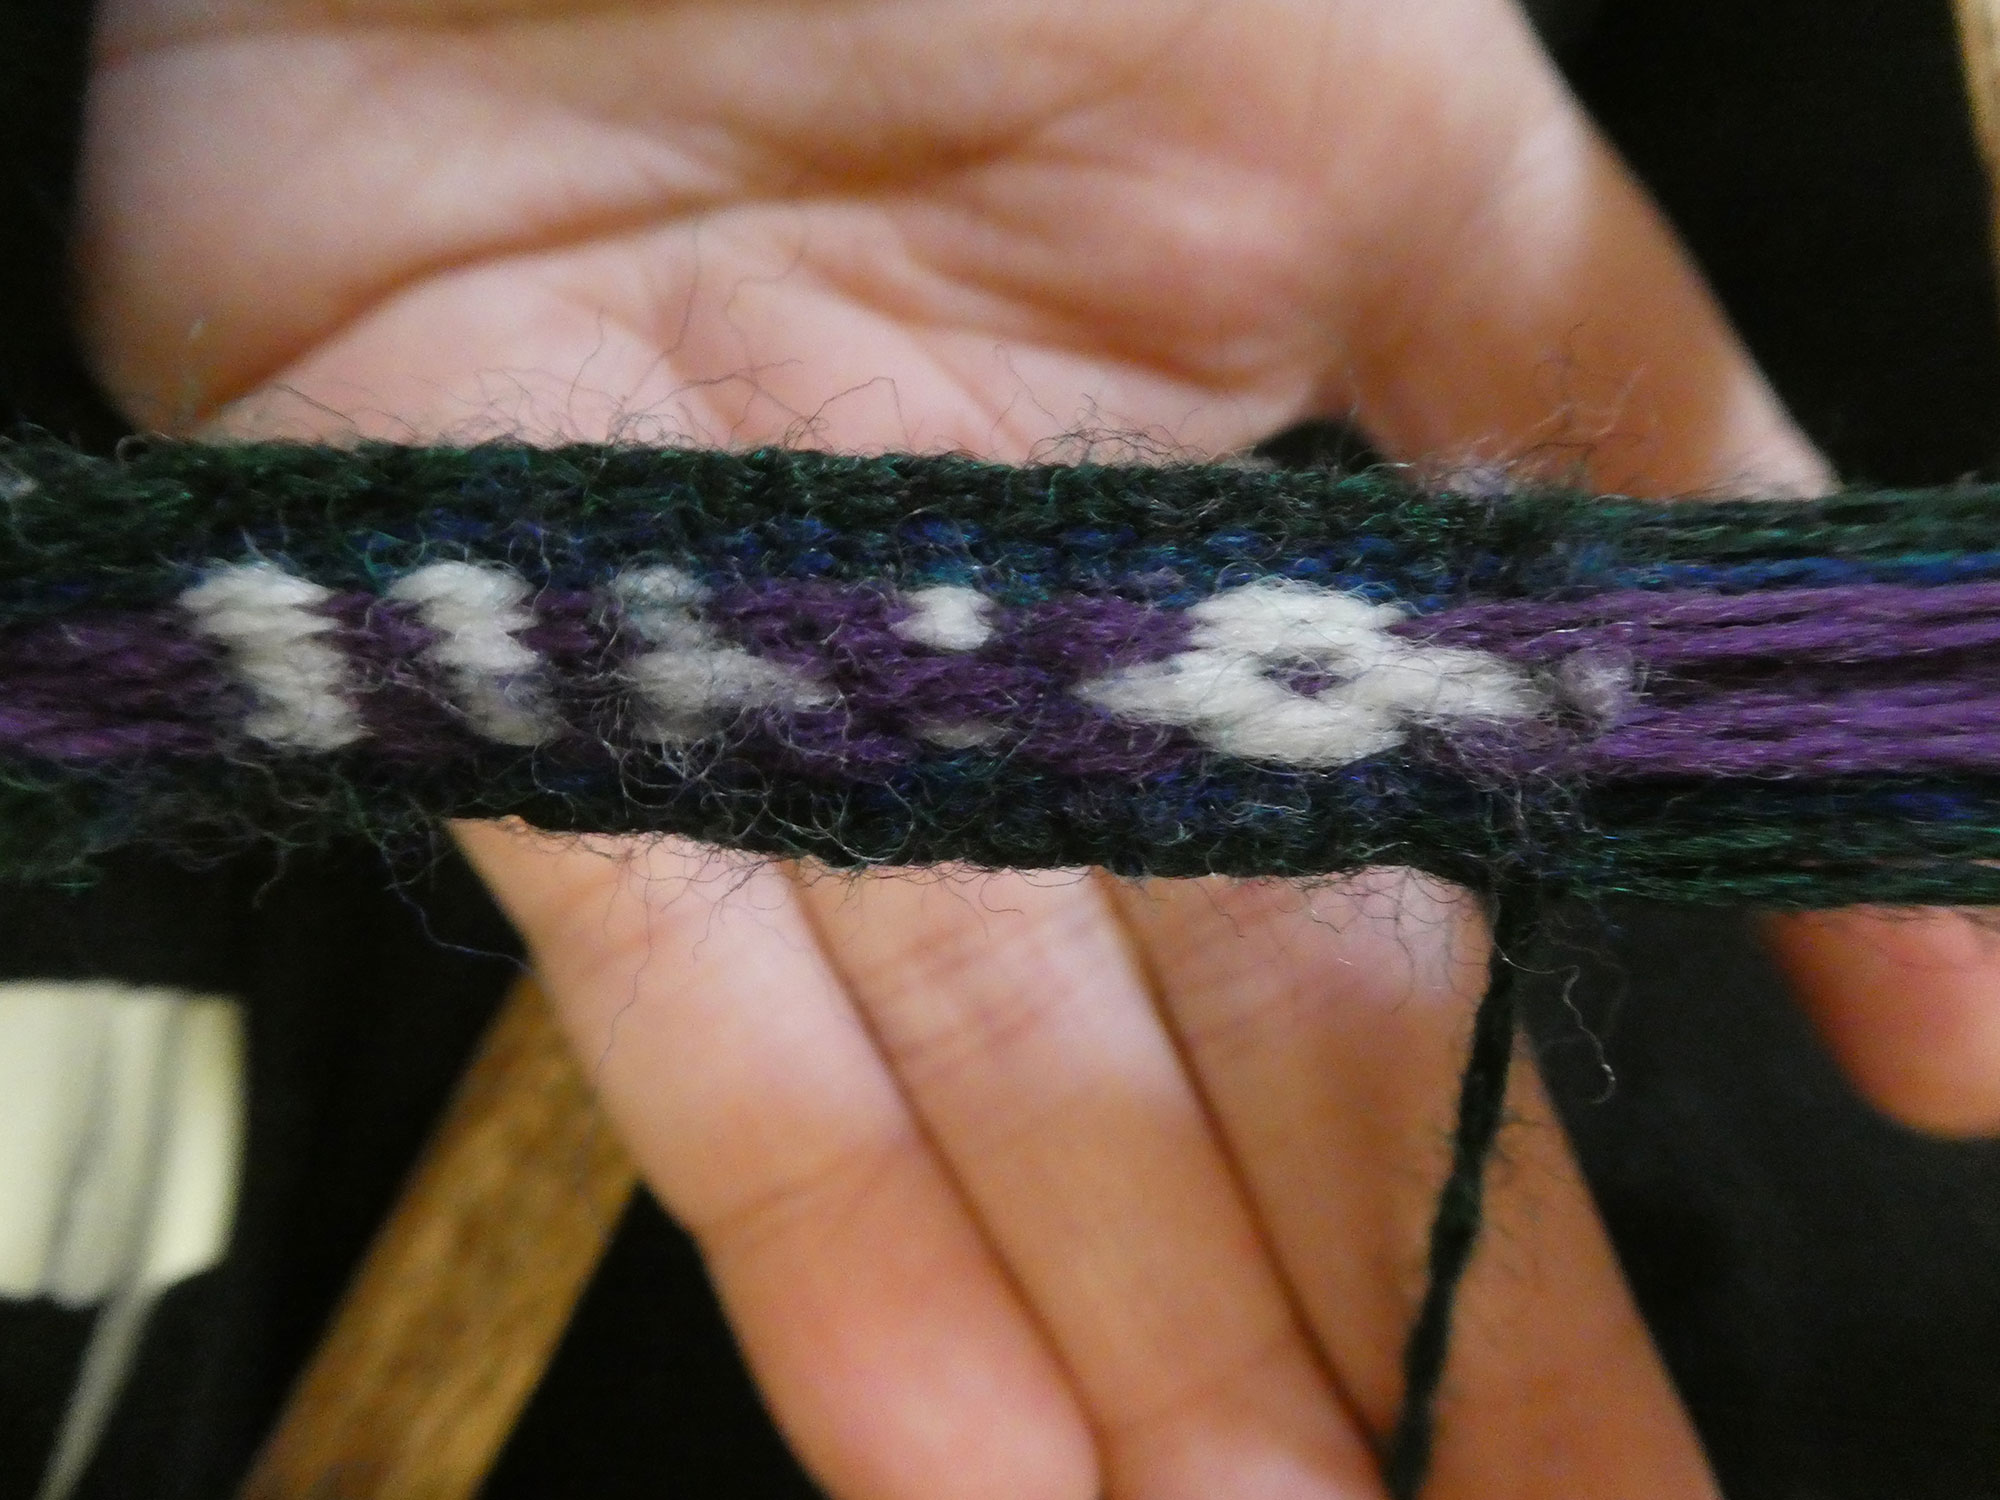
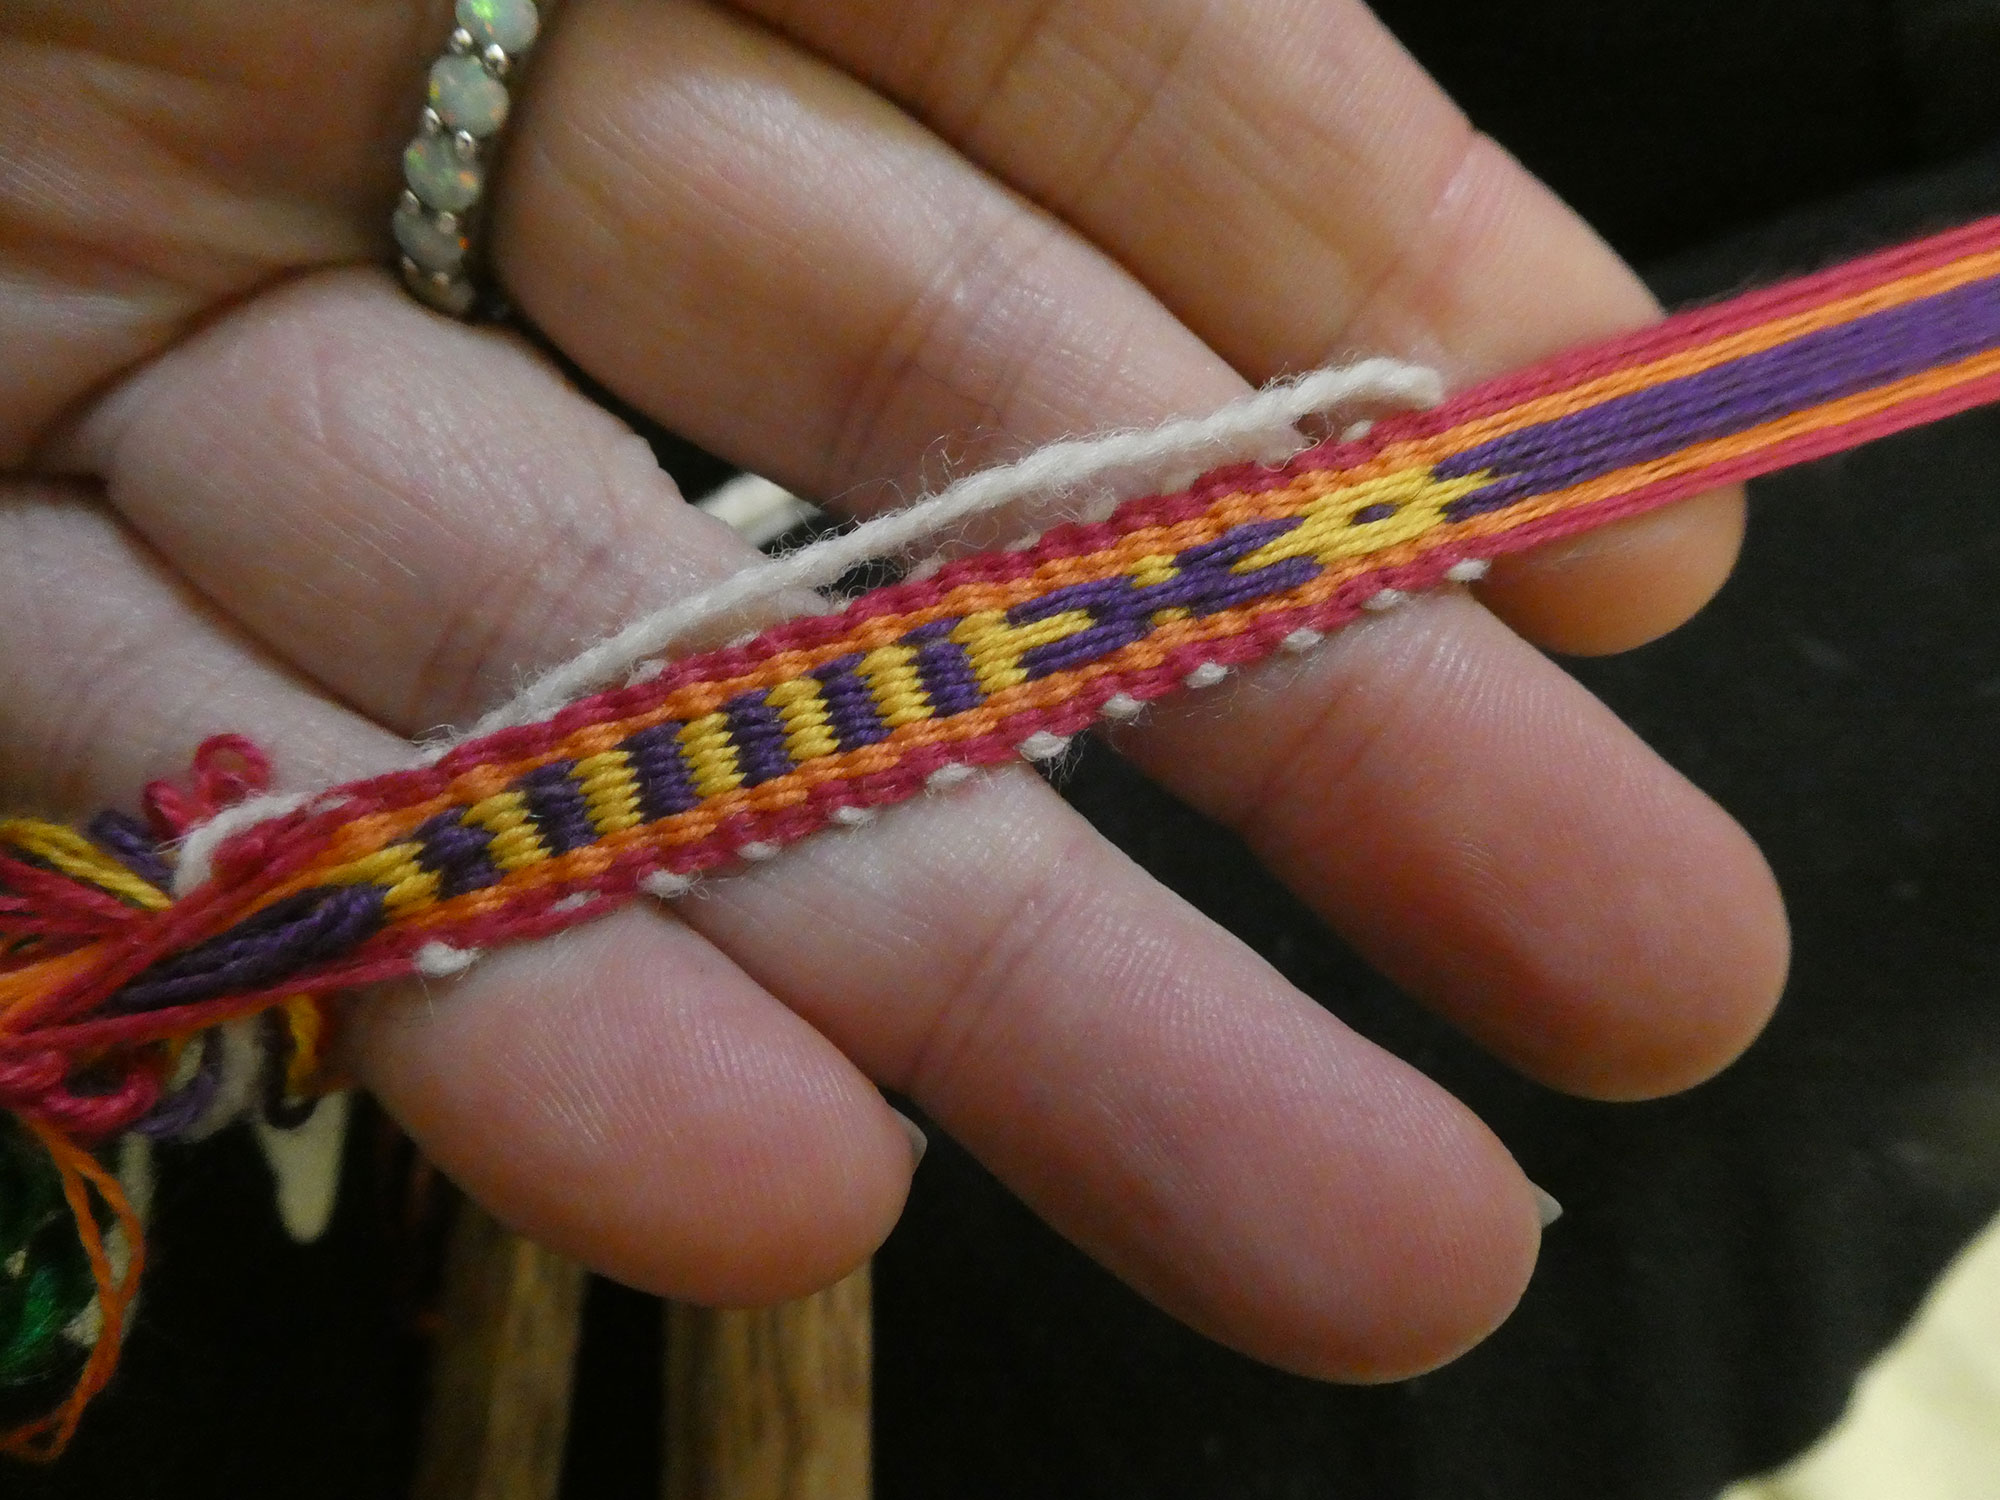
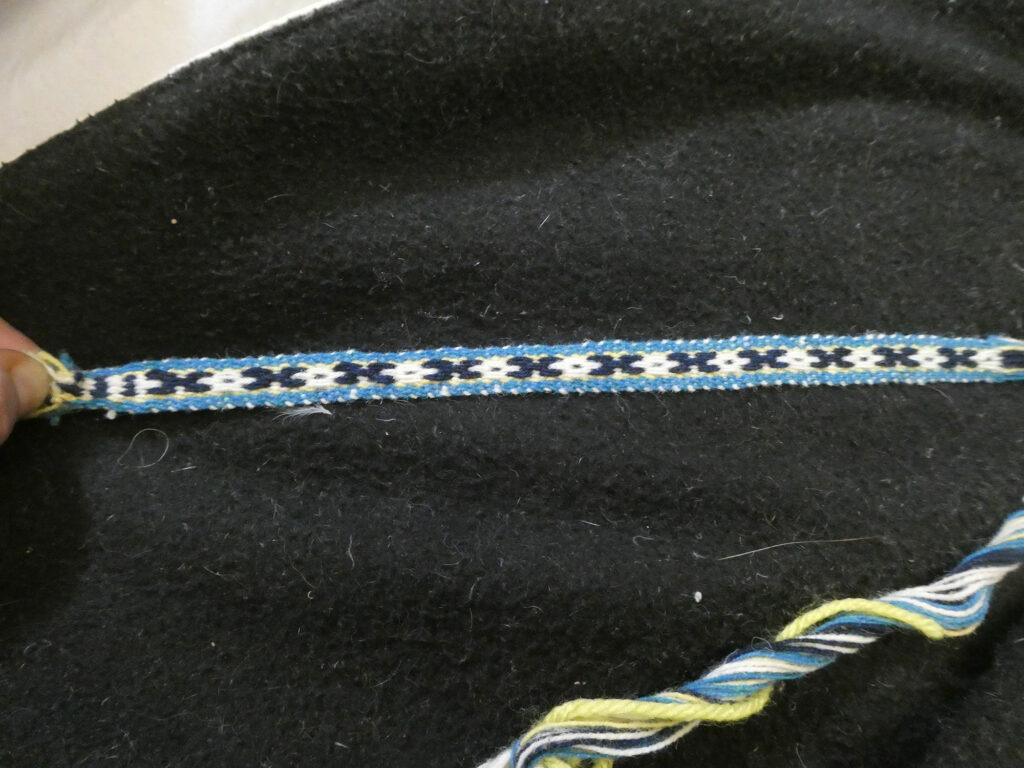
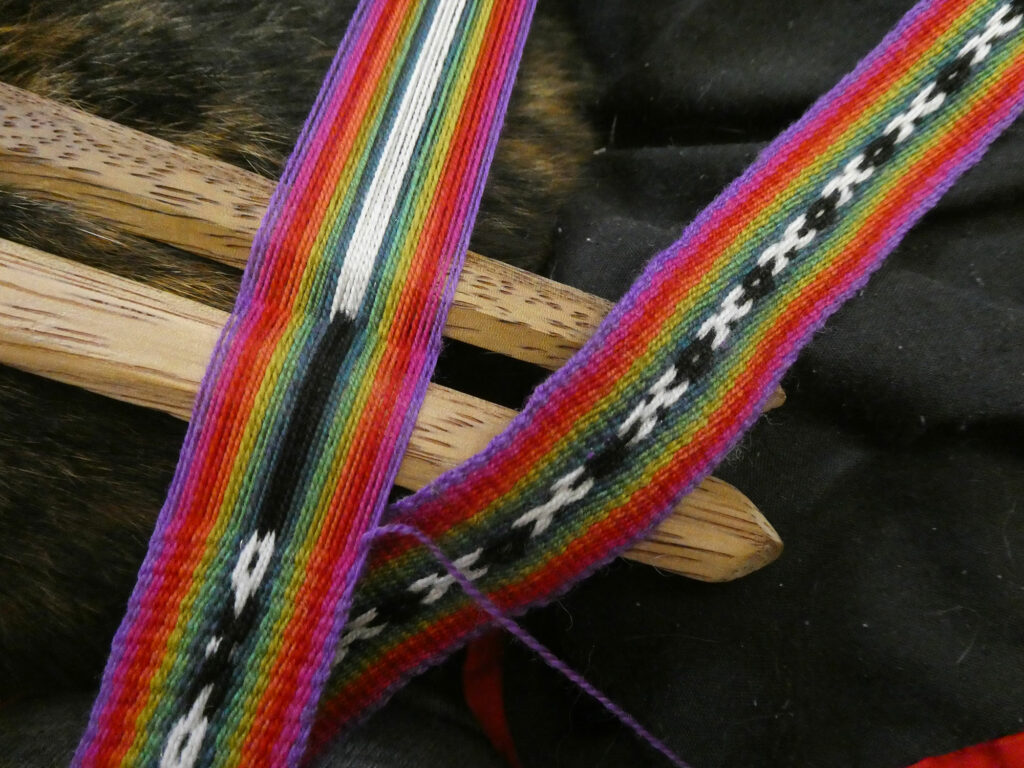
My first attempt at handspun didn’t have enough twist. It was easy to warp with, and was still high twist enough to not cause problems with the weaving, but the band hung limp and the pattern didn’t pop, although I am aware my colour choices didn’t help on this front.

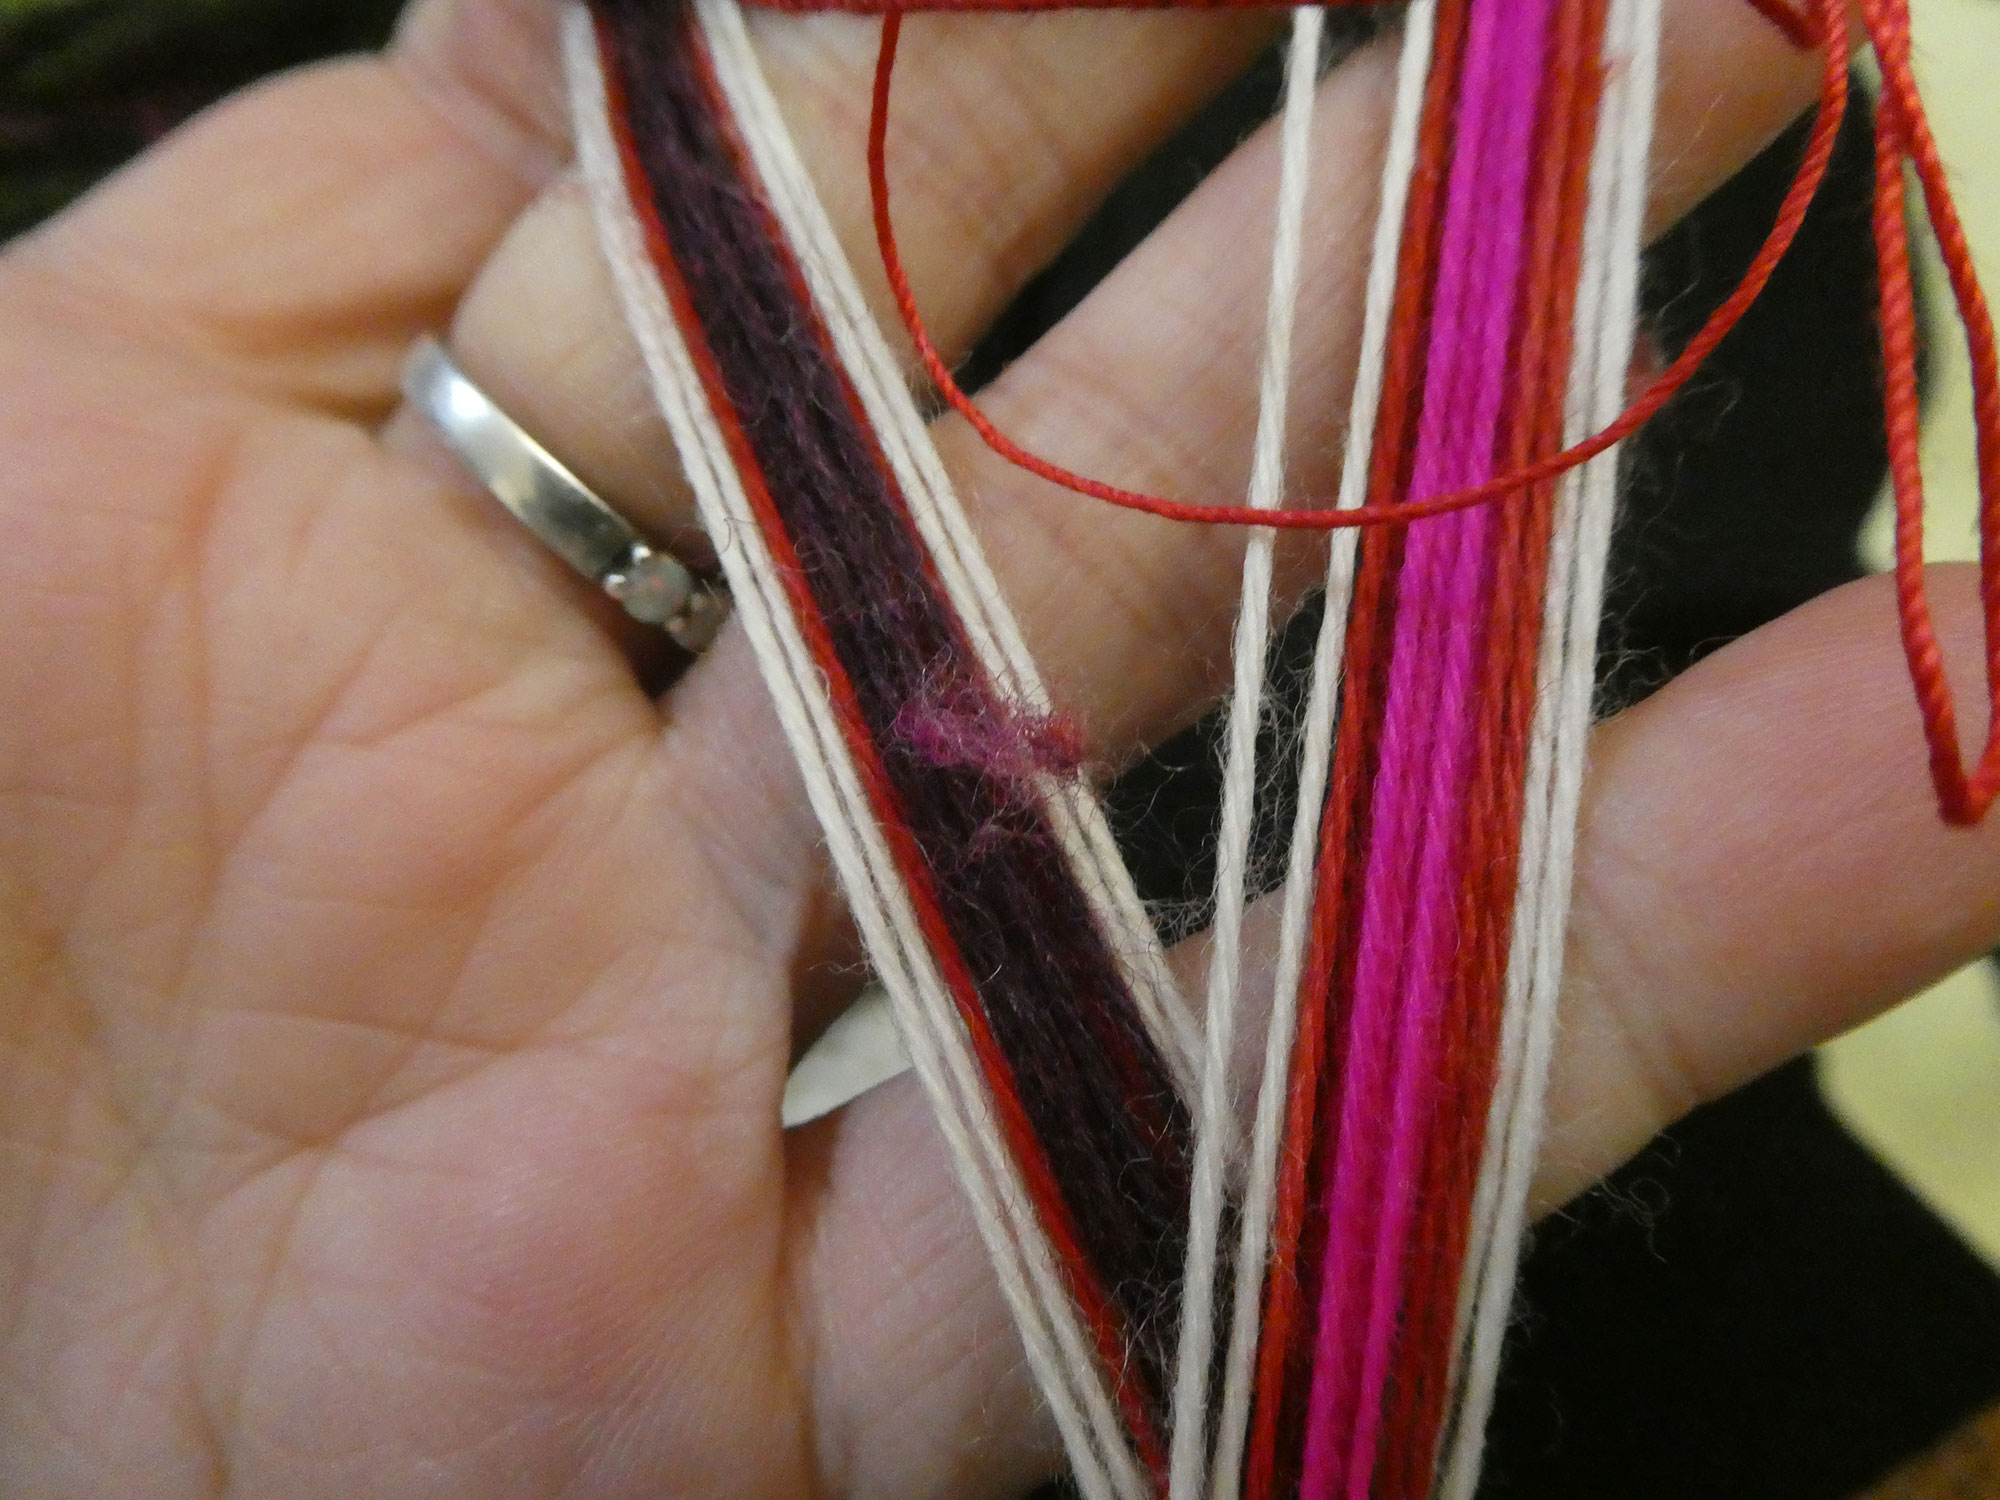
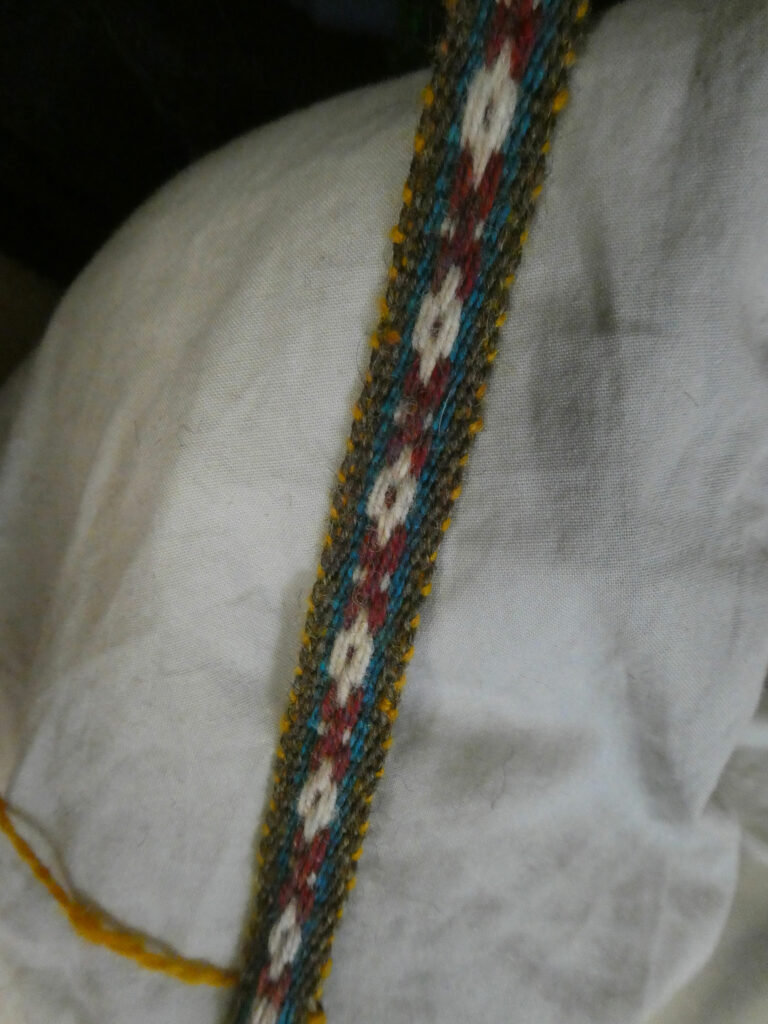
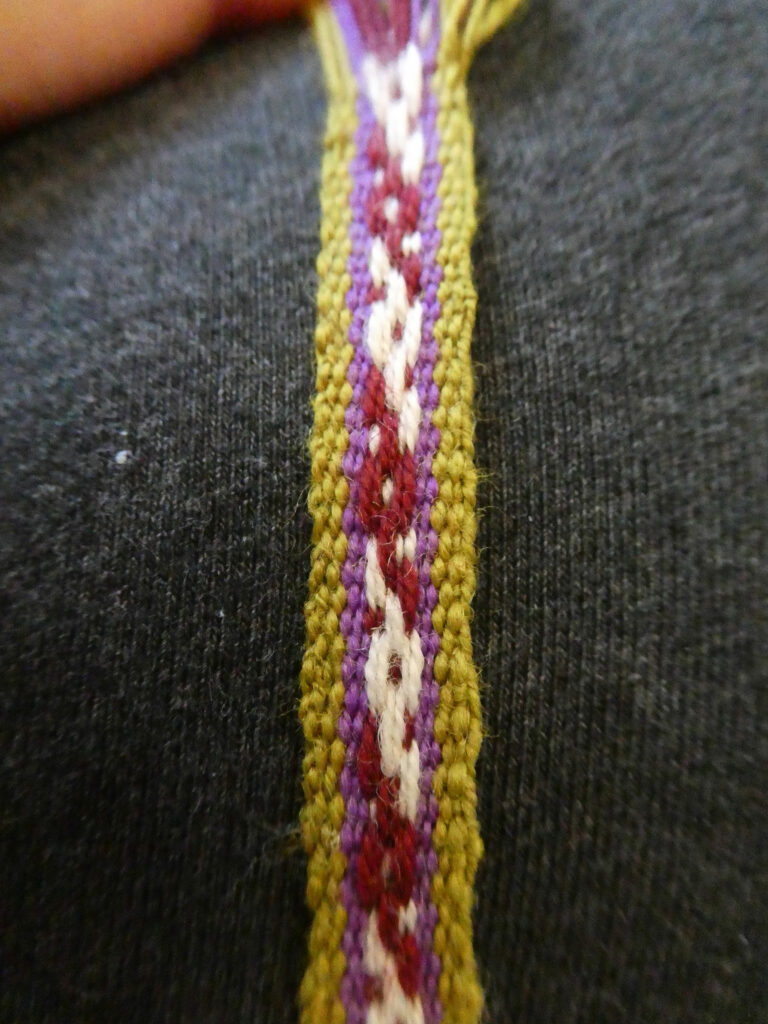
My second attempt had higher levels of twist, and the pattern showed better, but it still doesn’t have the very high twist angle of the andean yarns.

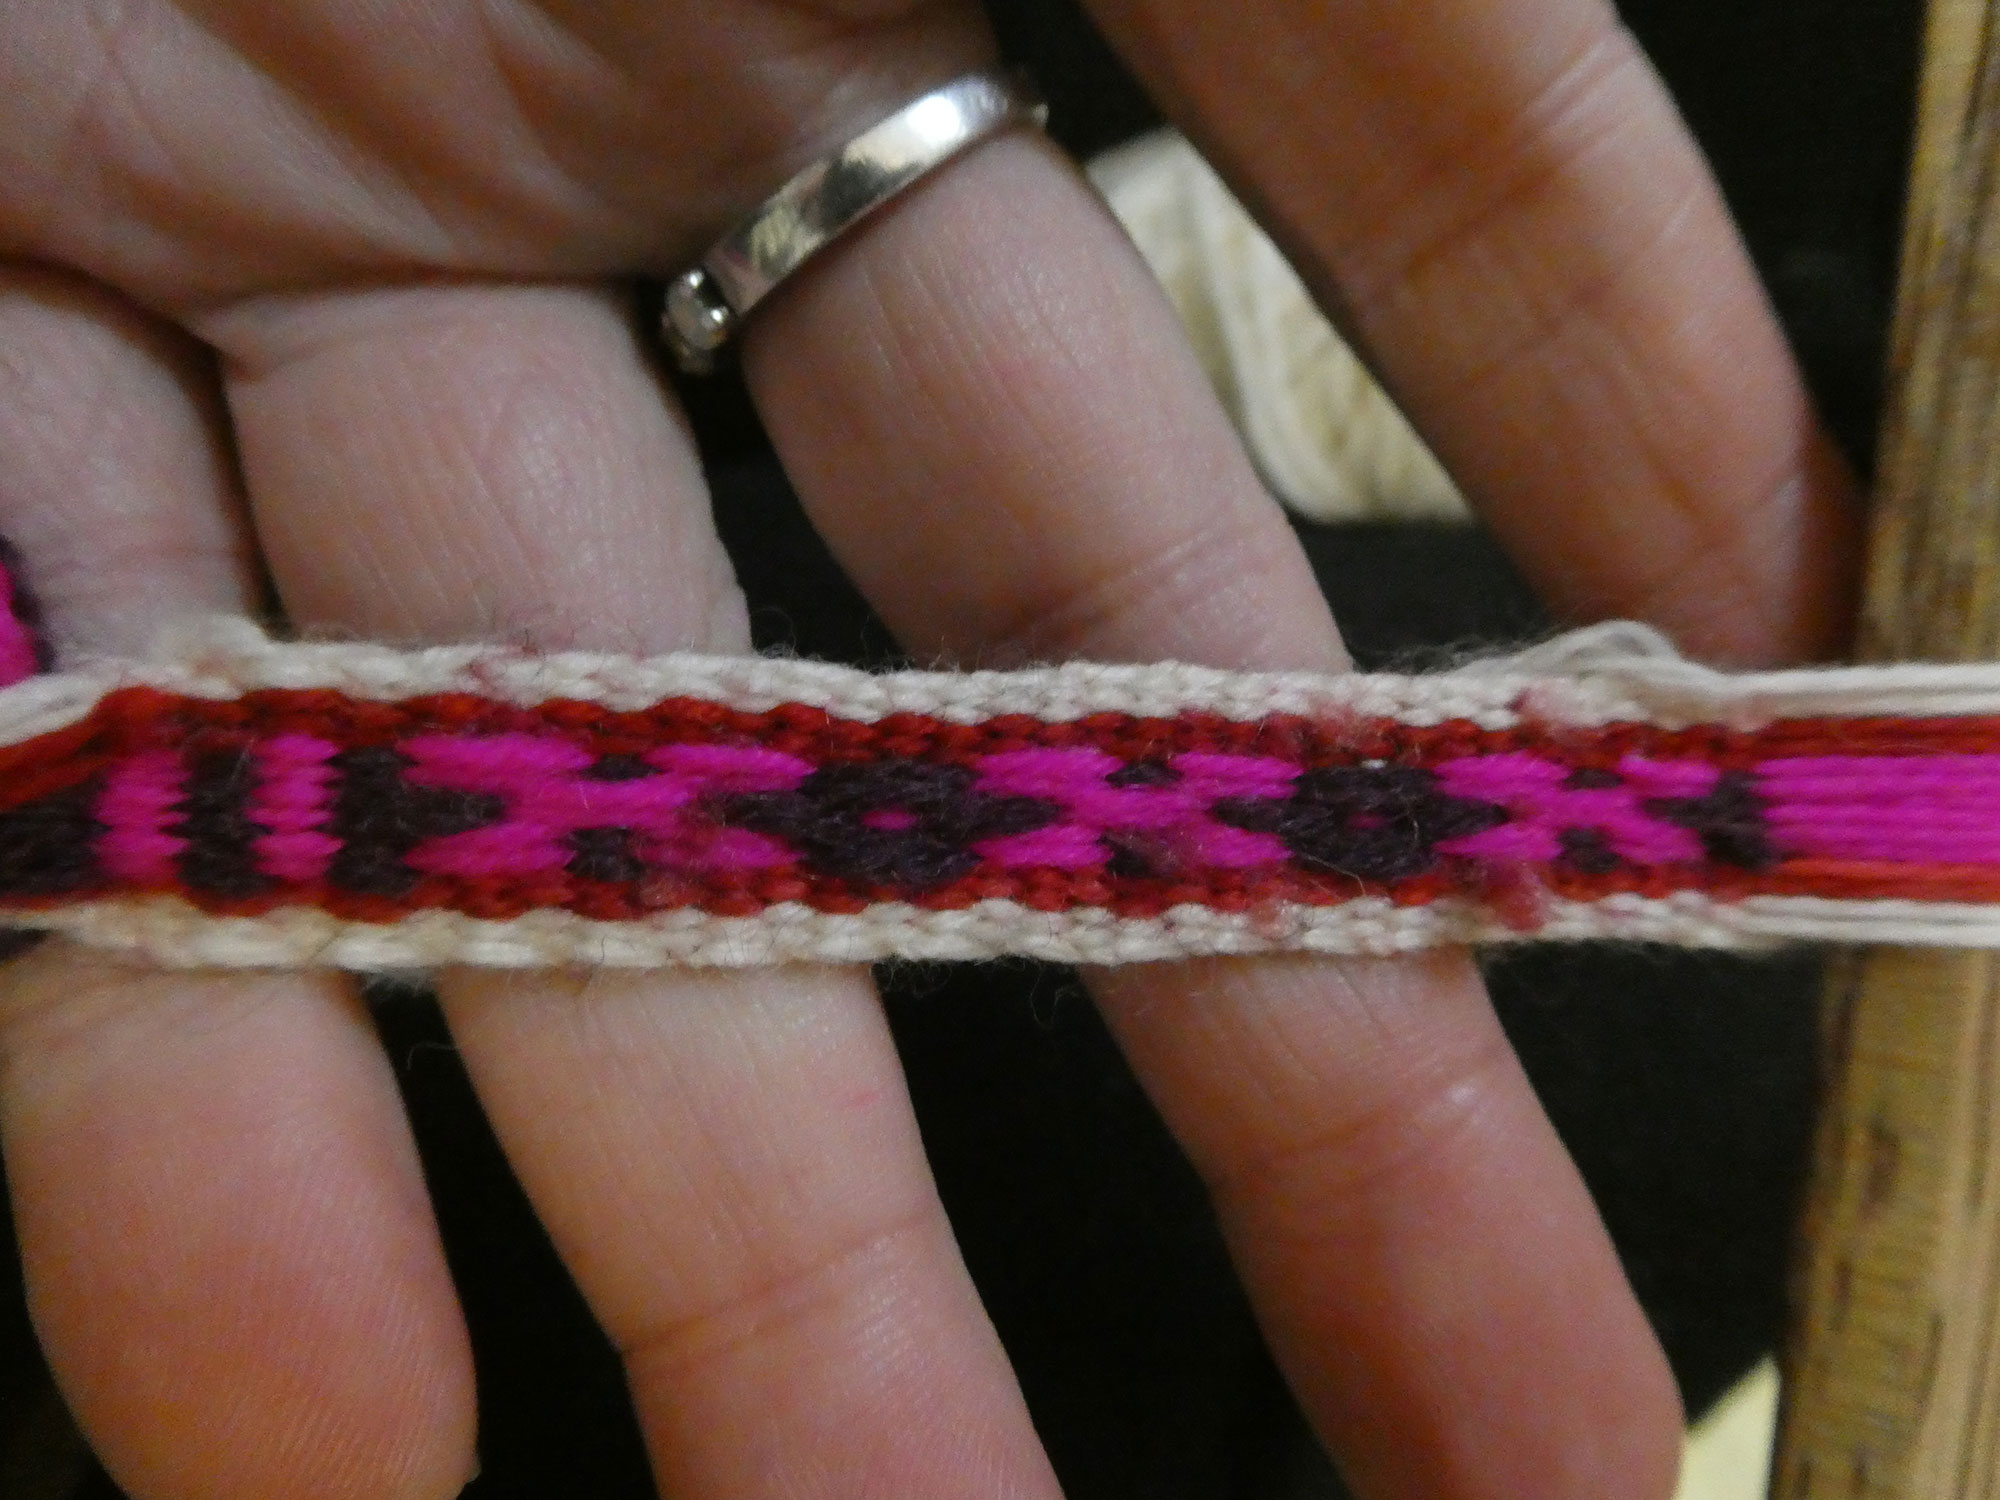
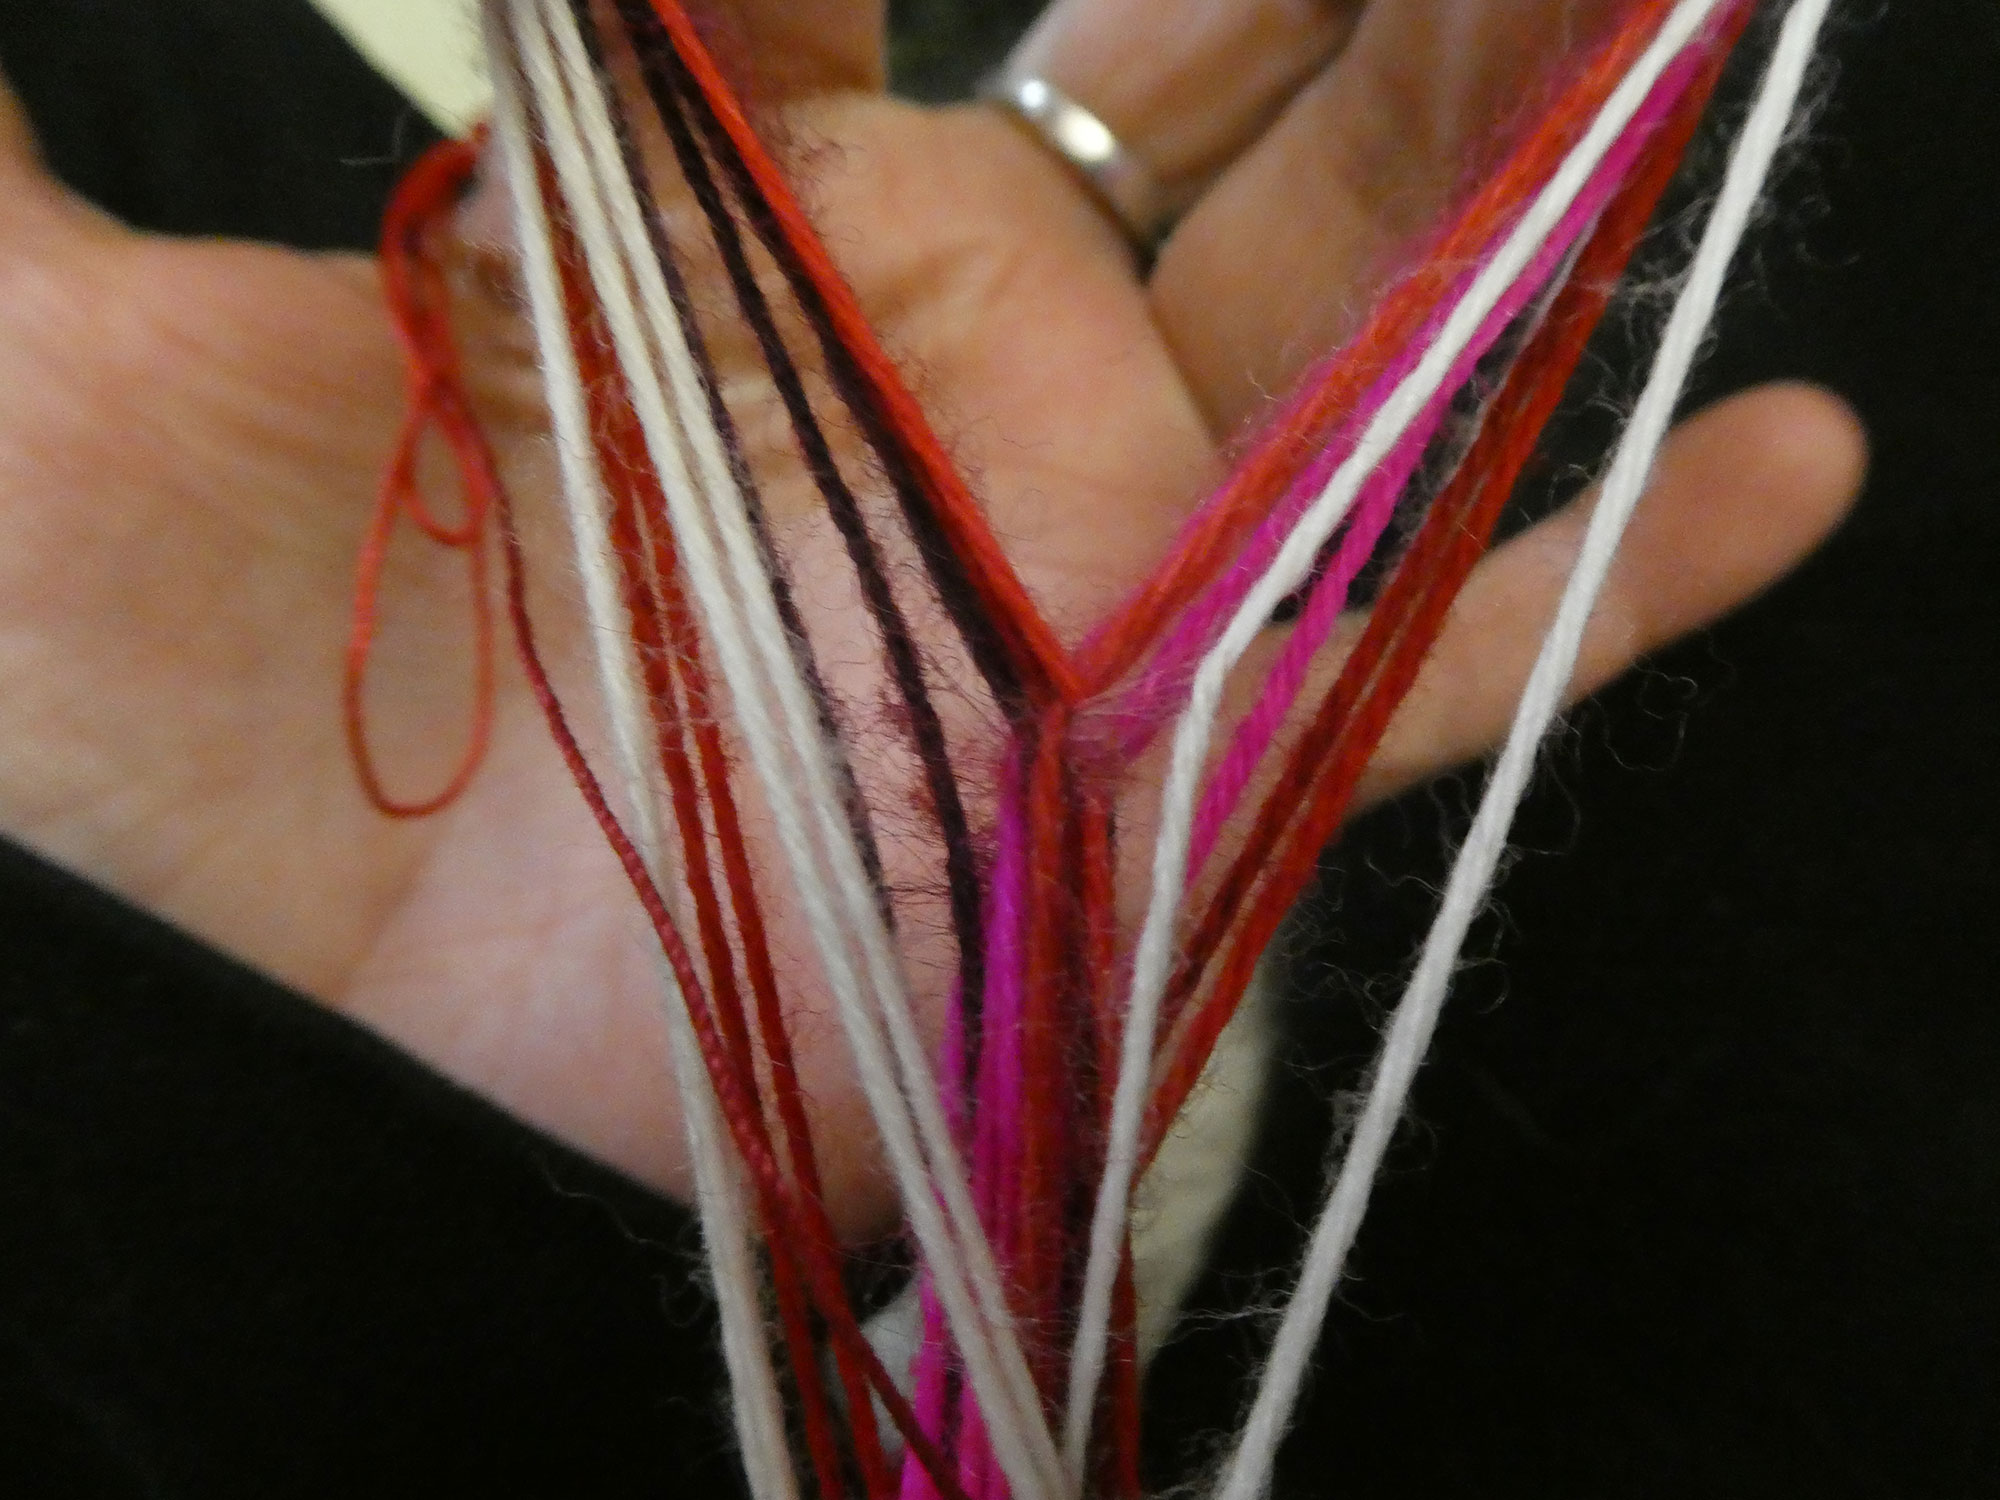
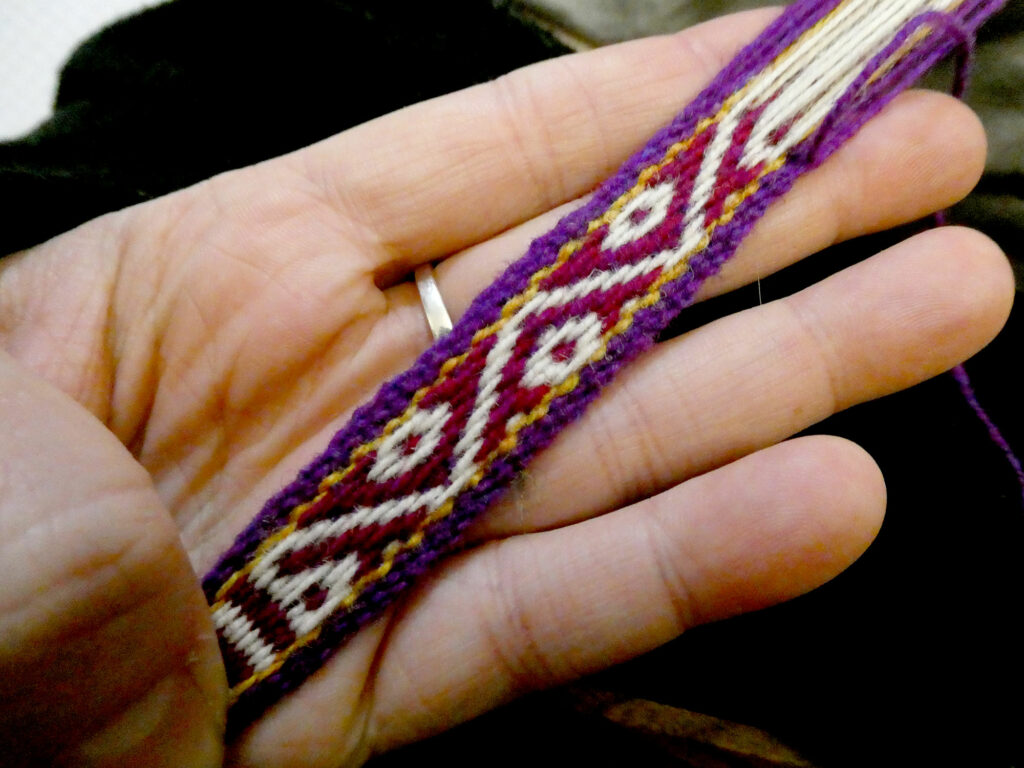
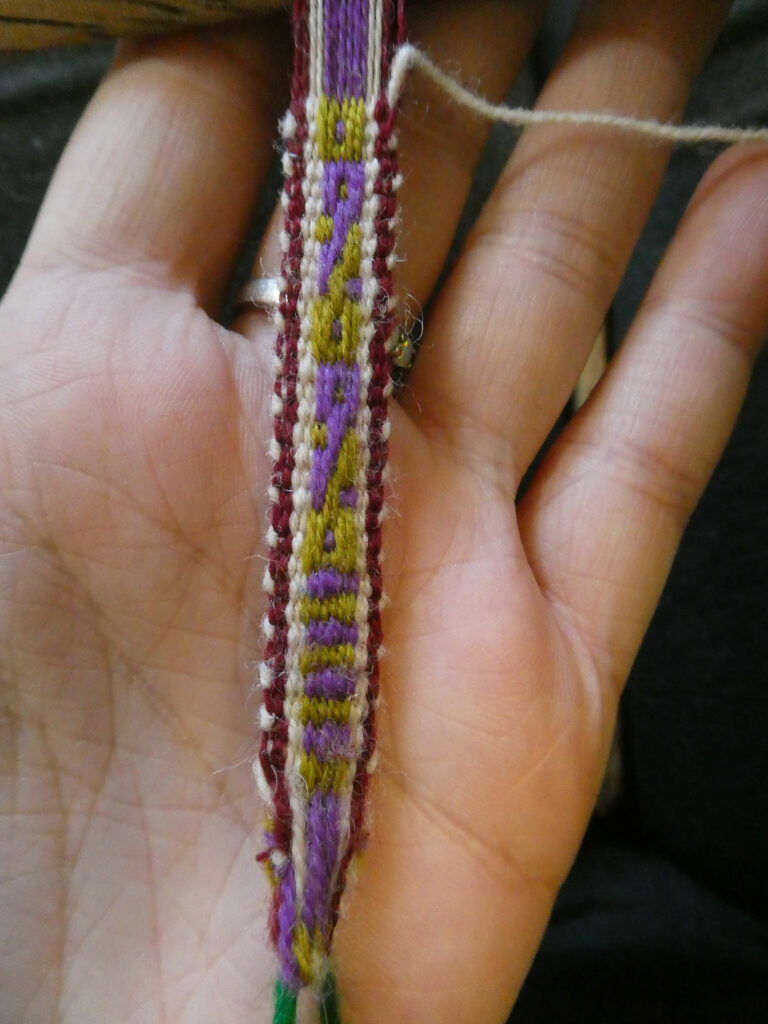
Finally I cracked it! These yarns were plied at a blistering 4200rpm, and I still couldn’t feed the yarn as fast as I’d have liked and needed to wait for twist to build. It’s totally worth it though, the patterns show up wonderfully and the yarn is a joy to weave with.

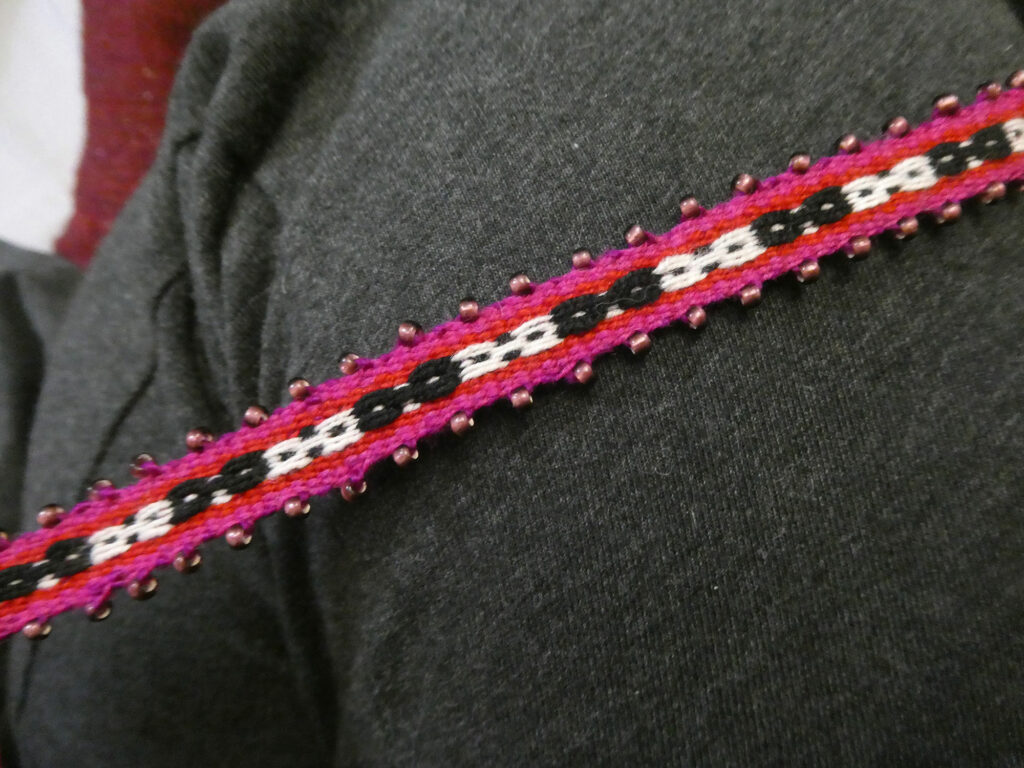
Rating: 8/10 – 10/10 Just being handspun doesn’t automatically make it perfect, but once you get the twist levels right, you’ll never want to weave with anything else.

Why decibel meters are a bit rubbish for figuring out e-spinner comparative volume.

A couple of months ago, while I was borrowing the travelling Daedalus Sparrow, I set it up alongside my Hansen Minispinner Pro and my Electric Eel Wheel 6.0, and downloaded a decibel meter app to my tablet, and got them all set up for measuring the volume of each. I tried as hard as I could to make it fair, removed the brake bands and positioned the flyer hooks near the front of the flyer, and moved the tablet between each measurement so it was the same distance from each machine while measuring. Rather than taking notes as I went, I recorded the whole process. When I came to edit the video and make a pretty table of all my measurements, I realised they were pretty much meaningless. The decibel measurement didn’t strongly correlate with the actual noise levels.

As an example, here are two sections of the video. Both of these spinners measured 73-74 decibels at the speed they are going in the video, and the noise level of each sounds similar to how it did in person… the same dB measurement, totally different volume. I know that decibel meter apps aren’t hugely accurate, but they are good enough for these purposes.

What gives?

To explain, I need to give a little background, which is hard as the dB scale isn’t that easy to understand intuitively. It’s a logarithmic scale rather than linear, which makes sense given the enormous range of figures we are talking about. A sound at 120dB is one trillion (1 with 12 0’s after it!) times the intensity of the quietest sound a person (with perfect hearing) can hear. A linear scale that goes from 0 to more than one trillion is hard to work with, but converting this to a logarithmic scale makes the numbers more manageable, once you understand the relationship between them. The decibel scale is a logarithmic scale based on powers of 10. That means, a sound 10 decibels louder than another is 10 times the intensity. So a 30 decibel noise is 10 times the intensity of a 20dB one, and 100 times that of a 10dB one.

When we are looking at e-spinners, the noise will be in the range of 50-70 decibels or so, and while our instinct may be to think that 70 isn’t that much more than 50, with this scale, it’s actually 100 times more. But 100 times more what? As I said above: sound intensity. That is, the amount of energy taken to produce the sound. You would perhaps expect this to equate to volume, but it doesn’t, for every 10dB increase in intensity, you perceive a 2-fold increase in volume, so that e-spinner that runs at 70dB will sound 4 times louder than the one at 50dB.

This was my understanding until I did these tests, and it’s correct, but incomplete. Sound intensity is not the only thing that affects how we hear sounds, the frequency (ie. pitch) of the noise also matters. Googling to figure out if frequency makes a difference to percieved volume led me to learn about phons. Wikipedia tells us:

“The phon is a logarithmic unit of loudness level for tones and complex sounds. Loudness is measured in sone which is a linear unit. Human sensitivity to sound is variable across different frequencies; therefore, although two different tones may present an identical sound pressure to a human ear, they may be psychoacoustically perceived as differing in loudness. The purpose of the phon is to provide a logarithmic measurement (like decibels) for perceived sound magnitude, while the primary loudness standard methods result in a linear representation.”

Tl;dr: 2 sounds measuring the same number of dB can have different volumes.

This handy graph shows you clearly… each of those red lines, at any point along the line, your ears will hear the sounds as being the same volume, due to the change in frequency, despite the fact that the sound intensity differs greatly.

800px-Lindos1.svg

The area of the chart we are interested in is mostly towards the left, your average flyer will rotate at 500-2000 rpm, which, divided by 60 gives 8-33Hz, which I think needs to be doubled to take into account the fact there are 2 flyer arms. The motor moves faster than the flyer, by a factor of 2-4 or so depending on the spinner in question, but doesn’t contribute much to the noise on modern e-spinners. There are also other noises involved, possible chatter of the bobbin, friction of the brake band on the bobbin, tension spring pulling against its mount, basically any part that touches something else and moves, will make a noise, some louder or more annoying than others. Some e-spinners have excellent noise dampening at certain frequencies, and poor dampening at others, so while they all get louder as they go faster, some don’t get as loud as others.

There are also other factors at play in how annoying or distracting we find a noise, clicking noises may be more irritating than humming noises, noises in the frequency range of what we are watching on TV may be harder to ignore than noises outside this range. Certain frequencies may cause the entire body of the espinner or the table it is on to resonate, creating more noise than you’d expect and more than at either a slightly faster or slower speed. Some people are just more sensitive to noise than others. I am one of those people, and most of my spinning is done in a room with little or no other background noise, which is why the volume of my e-spinners is such a big deal to me.

I’m not saying that decibels are a completely useless measurement for e-spinner volume. If you see that a certain model runs at 80 decibels, which is the same volume as a loud sewing machine, then this is going to be far louder than one at 50dB, frequency and type of noise notwithstanding. However if you have two machines that run at about the same sound intensity level, don’t assume that the one with lower dB is going to sound quieter.

I am now ready to write my comparison post, with more unscientific, but more accurate ‘this one is louder than that one’ descriptions, rather than a neat table of decibel measurements at different speeds. So watch this space!

Flax fibre comparisons

I have some amazing vintage Austrian flax from the Berta’s flax project, which is beautiful, but clearly a finite resource.

P1080636

I also have some homegrown flax, which is very exciting, but will need a lot of work before it is spinnable.

P1080548

So I thought I’d look around and see what commercial alternates are available. One I haven’t tried is flaxland, which is where I got my seeds from. I have no doubt their product would be of similar standard to the vintage stuff, but sadly it’s just too expensive for me. Knowing the work that goes it, it’s a totally fair price, but it’s still out of my budget.

Onto other options.

The first is the readily available flax top. You can get this from World of Wool, Winghams, and many other suppliers. It is the fibre I used for my flaxperiments where I explored some of the commonly stated ‘rules’ about flax spinning. It is available in a natural brown shade, as well as bleached white, and dyed various colours. The main way in which it differs from the vintage flax is in the staple length; it has been processed using the same machinery used for wool (or cotton, I’ve never been able to get a definitive answer on which they use), which just not designed to handle staples of a couple of feet long, so it is cut to about 4″ lengths and then made into a long length of commercially combed top. It has less dust and fewer bits of unwanted plant matter (boon/shive) than flax strick so it’s less messy to handle, but it’s rather tedious to spin as the drafting length is determined by the staple length, so I can only draft maybe a quarter of the length I’d like to. The coarseness of the fibre is about average for flax, and the yarn made from it turns out okay, and will soften up nicely when washed. It had a really strong sweet farmyard hay smell, far stronger than the less processed flax I’ve seen, but not unpleasant.

Pictured is fax top from world of wool

P1080634

My second option is water retted line flax from George Weil.

On opening the bag I found several bundles of fibre, looking somewhat coarse and matted and rather more green than I expected, and it was easy to tell the root and tip end apart.

P1080622

After running through the hackle the transformation was amazing, it looked and felt really smooth, though still had a more greenish tinge than I expected.

P1080625

Hackling the whole lot (aside from a small bit kept for comparison) didn’t take too long, but it did produce a surprising amount of tow. For 47g in the strick, there is 36g of tow. It won’t go to waste as we always need string for the garden, but if buying for a project, you’d need to budget a lot extra. It’s possible that combing out with a dog comb or similar would result in less waste than the hackle, but I suspect it would be far more work.

P1080632

Even allowing for wastage though, this is a good low-ish budget alternative provided you’re willing to put in the time hackling it.

The final thing I tried is Dew Retted Flax Line Sliver also from George Weil.

I really had no idea what I was getting with this, as the description said “Dew retted flax tow with a very long fibre for hand spinning into a linen yarn or paper making. The fibre is very similar in appearance to the Natural Flax Tow.” This confused me, as how can it be line flax, and sliver, and long, and tow all at the same time, but it was cheap (only £2.64/100g) so I thought I’d give it a go.

P1080627

It’s a beautiful soft grey, has a lovely sheen, and is in a long continuous sliver. It’s the finest flax I’ve ever seen. I was under the impression that commercial machinery can’t handle the staple length of flax, so I pulled off a few staples to see how long they were

P1080628

Impressive, in the region of the lengths of the other flax, around 20″ for the longest fibres, with the bulk being 12″ or so.

I took this pile of staples I’d pulled from the sliver and ran them through the hackle a bit. This did leave me with an improved product, smoother and even shinier, but there was way too much waste for it to be worth it for me. I will see if combing out with a dog comb or similar removes the shorter bits and aligns the longer ones better without so many longer ones being wasted.

P1080629

I have not spun this (or the previous) fibre yet, but I am really excited to give it a try, it seems so soft and is such a beautiful colour I’m sure it will make a lovely yarn. It even feels like it might be draftable from the end of the sliver easily without any clumping, but if not either pulling off staples and overlapping them on a distaff, or wrapping in a towel would be an easy way to manage it. I may revise my opinion after spinning it, and I may decide that hackling it is worthwhile after all, but currently I am very impressed that one of the cheaper options seems so good.

Sojourner makes a new friend

“Vampy?”

“Yes Sojourner?”

“We’ve been on lots of adventures, seen lots of plants, done lots of spinning, and met some of your friends, and it was great fun, but I’m a little lonely, I’d really like a friend of my own.”

“What do you mean? You’ve met loads of new people, we went to 4 guild meetings, did you not have fun?”

“Sure, it was fun, especially helping the first time spinner make wonderfully even yarn, but, yanno, it was work. I was hoping for some fun social time.”

“What about the espinner party we had last week?”

P1080376

“Those guys are even worse! All they wanted to do was talk about work, no fun at all! And one of them was an Eel… eew! I was thinking maybe of something more… avian?”

“Oh! I know just the thing! hang on, let me put some shoes on and we’ll go visit Nina and Rowena”

P1080321

“Thanks! That’s more what I was thinking, but, and I really don’t want to sound ungrateful here, but chickens are stupid. Really really stupid. We just don’t have a huge amount in common.”

“Hmm. I know! I have the perfect friend for you! Clive!”

“Clive?”

“Professor Clive Tawny, Guardian of the Craft Room. Let me take you to meet him. Don’t be scared, he’s a vegetarian!”

P1080385

“Perfect! Thank you so much for introducing us, we had a wonderful evening together. Please pass on my email address to him, I’d really like to stay in touch.”

For those wondering about Clive, when you live in the countryside you meet all sorts of strange people in the pub, including your local taxidermist. My parents used to live in a converted barn and my Dad decided it would be nice to have an owl sitting on one of the beams in his library. He mentioned this to the taxidermist in my village and after a year or so one of his roadkill collectors found Clive for him, so my Dad got his wish. When my parents downsized to a smaller place, Dad offered him to me, and now he sits on a very high shelf in the craft room, away from cats.

Sojourner does some gardening

Today I thought it was high time Sojourner learned where her fibre comes from. I showed her what happens to cotton after it is spun:

P1080432

And also some cotton bolls and fibre from the last time I grew it… it doesn’t grow too well in the UK, but I managed to get a little.

P1080396

After that we went outside to the garden. A very small bird in a very big greenhouse

P1080422

After fighting our way past the overgrown lettuce and tomatillo plants, we made it to the cotton!

P1080400

Soon she was distracted by all the other greenery around her, so I showed her what Japanese Indigo looks like and told her to watch out for pretty blue fibre.

P1080403

She was such a happy bird outdoors we went and looked at a few other plants.

Before relaxing for a while first on the moss, then by the waterfall.

She wasn’t done there though, there’s just so much more to learn. I told her all about flax:

P1080430

And she learned how it grows

P1080296

After a very busy and educational day, I think the best thing for us to do is curl up in bed with a cat and do some spinning!

P1080372

Sparrow Migration

I have a new friend visiting for two weeks!

P1080313

She is a Daedalus Sparrow e-spinner, and part of their ‘Sparrow Migration Program‘ where she is sent round the country to spend a fortnight each with various different spinners, and we get to take her on an adventure and write up our experiences.

I initially tried her for just 10 minutes to make sure everything was there and working properly, before getting on with my Tour de Fleece spinning on my wheels. Now the tour is over I have much more time to get to know her, but I decided that I would write up my initial impressions based on that first short spin, then do the same after a fortnight and see what has changed, whether I’ve got used to things I initially didn’t like, and whether I notice anything else.

My initial thoughts:

– So cute! although small, the bobbin is actually of a reasonable size and I’d have no concerns about spinning for a sweater on this. The size makes it really nice and portable. The very small (looks to be 5 or 6mm) orifice means that most art yarns won’t be possible, but that’s fine, I’d generally prefer a larger bobbin for those sorts of yarns anyway. It’ll easily handle thicknesses of up to worsted weight, and given I generally spin in the fingering weight range, the size is more than adequate.

– The spinner itself feels really sturdy and well-made with rubber feet that mean it’s not going to slide around. Initially I was surprised that the controller felt a bit flimsy, but on actually looking at it I think it’s just that the front panel moves as part of the switch mechanism, which I wasn’t expecting.

– I am ambivalent about the separate control panel. On the one hand, I love that it’s on a cable that means I can position it closer to me than the spinner so I can reach the controls easily but have a nice long distance between my hands and the orifice. On the other hand, it means that a small spinner ends up having a fairly large footprint, and I can’t just grab it with one hand (also, the orifice hook is stuck with magnets to where I’d instinctively go to pick it up)

– The control panel options are AWESOME. I love the programmable soft start and stop and can see myself using a very slow start for super fine yarn, and a slower stop for full bobbins of dense yarn. The option to be able to change the speed adjustment increment is interesting too, while it’s not easy to change on the fly, it does at least mean you don’t have to press the speed buttons hundreds of times if you’re spinning small samples of very different yarns. I love that the speed display lets you set a repeatable speed for consistent spins. I am used to espinners with speed dials though, so not being able to quickly set the speed after starting up will take a bit of getting used to; having to press the button lots of times is a bit annoying, but once happily spinning I doubt I’ll need to mess with it at all. Using the controller itself is a little fiddly, with the direction/off switch needing setting, and then the menu options, and it needing to be switched off or running while you adjust the speed, and generally the order of pressing buttons to get it to do what you want it to. I imagine this is just a learning curve thing and once I’ve played for longer I won’t need to think about it (and indeed won’t need to adjust most of the stuff very often), I just didn’t find it intuitive

– The spinner itself feels sturdy and solid, and everything turns smoothly. The bearings mean that no oiling of moving parts is needed, and you get a really smooth spin. The motor is really nice and quiet. Changing bobbins is fairly easy as the front maiden has a swivel that lets you move the flyer shaft without needing to pop the driveband off. The motor itself has very little clearance underneath, so I think you’d always need to use it on a flat surface, no putting it straight on the sofa/bed. I love that you can change the motor and brake band around to switch between scotch and Irish tension modes, although I’d not had a chance to try this yet. I really love the tension setup with a large and fine adjustment option. Initially I was unsure of the fine adjustment screw as I’m used to a tension knob that turns in a horizontal plane, but I began to get used to the vertically mounted knob very fast, so I’m sure after playing more I’ll love it. I did not like threading it, the orifice is small, and the back side of the orifice is too, so it’s really fiddly to catch the yarn with the hook. Even the yarn guides are fairly small and hard to thread. I really like how the yarn guides both move nicely, and stay put. It also has the back of the orifice and the path to the hooks positioned differently to every other wheel I’ve used, so it’ll take some getting used to. The curved shape of the front of the flyer, and the fact that one hook faces up while the other is down (so the flyer is really nicely balanced) means that I can’t cross lace easily between the front 2 hooks, which I sometimes do on my flyer wheels to reduce takeup with very fine yarns without having to lace from one flyer arm to another and have abrasion of my singles on the ready-spun yarn. This is unlikely to be a huge issue with this spinner as you can get the takeup really low, but when I quickly tried superfine spinning, I did find I couldn’t get it quite as low as I would like. If it were my own wheel I think changing out the brake band for something finer would help with this, but it’s not something I’d want to do with this one as I’d worry that a finer band might wear away the plastic of the bobbin end. The bobbin end has two different sized whorls which I imagine would be good for those who like to spin with higher tension, for me I will only ever use the smaller one as I like a very light touch. The top speed of 2000rpm is enough for most spinning, though I would like it to be faster; I spun most of my last longest thread competition entry at 3000rpm, and would have liked a little more speed than that if I could have got the tension low enough to cope with that. I did have it up to full speed for a little while and it was nice and quiet given the speed, at lower speeds it’s even quieter; certainly quiet enough to watch TV while using it.

My first impressions are overwhelmingly positive, despite having several e-spinners and wheels already, I’d really love one of these guys too. Really the only thing that I don’t like is that it’s not easy to thread, I can imagine this getting very frustrating for a beginner who has lots of breaks, or indeed for me when I’m trying to spin longest thread competition level fineness.

Yesterday we went to the very first in-person meeting of the Norwich City Guild of Weavers Spinners and Dyers and lots of people got to try her out, most of whom had never used an e-spinner before, and one of whom had never spun at all before. Everyone enjoyed using her, some were surprised by how much they liked it.

Flaxperiments part 2

This is part 2 of my sampling experiments with flax. For part 1, click here.

P1070765

Apologies for the ear in the above picture, Boo was a very helpful helper today.

So, the flax from experiment 1 was washed. I did this simply by sticking it in a pan of boiling water for an hour. The first thing I learned was that while tyvek wristbands do hold up to boiling water, Sharpie marker doesn’t, and while enough was left on the labels that I could read them, my water and flax were tinged pink. The cotton I used to tie the skeins with wasn’t though.


Does wet finishing do anything noticeable?

Here are all the finished yarns (bottom) with their unfinished counterparts. Immediately upon removing from the drying rack the yarns had a slightly crisp feel, but that has gone away with a little handling. The wet finished yarns are noticeably less fluffy than the originals.

Back to the original experiments

Here are the yarns after wet finishing:

1) Spun dry, Z twist

2) Water added after point of twist, Z twist

3) Water added at point of twist, Z twist

4) Water added at point of twist, S twist

It’s a little hard to see differences, especially in the very close up microscope pictures, but it’s very clear that for a smooth yarn, you need to spin the flax wet. Introducing the water at the point of twist rather than afterwards seems to give a slightly smoother yarn. I think I ended up with an unrepresentative part of the yarn under he scope for sample 2, as the rest was far smoother. Twist direction seems to make no difference whatsoever to the naked eye, but the microscope images of sample 4 do seem smoother than 3. I will have to check both several more times in different areas of the yarn to see if this holds true overall or if I just ended up with unrepresentative sample areas; I didn’t pick the area I photographed, I just wrapped the yarn on a card and pushed the card as far back under the scope as it could go, then move it side to side until yarn was in shot.


Bonus experiment!

Having just got hold of an old flax hackle from the Netherlands (thanks Pimmie!) I was tempted to have a little try with the stricks of flax I have, but only a teeny bit, as I do want to finish the top before starting on it properly.

I separated off just a small section of flax:

P1070754

And ran it through the hackle a few times from each end:

P1070757

Here’s the combed out stuff alongside the tow and the original strick:

P1070759

I spun it without a distaff, rolled into my lap cloth. This didn’t work too well as there wasn’t really enough fibre to hold itself together in there, so after a minute or so it all pulled out, I laid it flat on my lap to carry on, but the fibres stuck a little while drafting, which explains the lumpy areas. Even so, they are far fewer than with the top. I spun this with a short forward draw with water added at the point of twist insertion, and the long staple length made the process far faster than spinning the top, and very enjoyable. Normally when people say ‘I let the fibre tell me how thick to spin it’, my reaction is ‘no! your fibre isn’t the boss of you! you tell it how thick it should be!’, but in this case, as it was such a small quantity, when the fibre wanted to draft fine, I didn’t object, figuring I can use it for sewing thread as it’s very strong. When the fibre was all spun I made a quick plying bracelet and self-plied it, which means one of my singles runs root to tip, and the other the other way… I can’t tell the difference!

As you can see, this stuff is far less fluffy than the top, the longer staple length means there are far fewer ends to stick out in the first place, and the more parallel alignment (until I messed it up anyway!) means there are fewer snags and lumps. I am also intrigued by the depth of colour variation, and having seen the disgusting dirty looking water after wet finishing flax am interested to see if and how it changes once boiled.

I have a feeling I am really going to enjoy spinning the rest of this flax, although I now need to decide exactly how I want to spin it: incredibly fine would be wonderful and make amazing fabric, but it would take a very long time, and there would be so much loom waste I may get disheartened. I forsee more sampling in my future… once I’ve made myself a distaff anyway!

Flaxperiments part 1

flaxperiment1

For the last month or so, much of my fibre conversation has been about flax. This is partly due to a friend spinning and weaving some wonderful linen fabric, partly due to Berta’s Flax, and partly due to me buying flax seeds on a semi-whim last year and planting them this year. With all this talk of flax, I thought I’d better learn to spin it.

I have spun a little flax in the past, but not really enough to fully understand how it works. I read the flax issue of the excellent PLY magazine, and as much as I could find in the Berta’s Flax facebook group and elsewhere online. In my reading I came across lots of rules, lots of ‘you must’s and ‘you should’s. Now 99% of the time someone says ‘you must’ when talking about something to do with spinning, they are wrong and I ignore them. Sure, there are some things that are highly advisable due to ergonomics/body posture/injury prevention, and some that are recommended for practical reasons, for example spinning short fibres using a longdraw method…while a short forward draw might be possible, it would be incredibly slow and tedious. These sorts of things, explained with a clear reason as to why you ‘should’ do something a certain way are fine. The rest of the time though? Telling me I ‘should’ or ‘must’ do something without any reason? This will normally result in me saying ‘why? why can’t I do it any other way? what will happen? well I’m gonna do it that way anyway and you can’t stop me.’ With flax there seem to be lots of ‘rules’ with either no explanation, or very suspicious sounding explanations, so I decided to spin some samples to try and find out whether they are simply old wives tales or whether there’s any truth at all in them.

Direction of twist

This is probably the most common, and most varied rule I’ve come across. When spinning there are two possible directions in which you can twist the fibres, either clockwise (Z), or anticlockwise (S). In the modern western world the tradition is generally to spin Z and ply S, although yarn for crochet is sometimes done the opposite way. When referring to flax I’ve seen the ‘rule’ variously stated as:

– flax needs to be spun S
– all bast fibres need to be spun S
– all plant fibres need to be spun S
– flax needs to be spun S and hemp needs to be spun Z
– flax grown in the northern hemisphere needs to be spun S, southern hemisphere Z

The reasoning behind this is apparently that as it grows the plant twists to follow the path of the sun, and thus the fibres end up with a natural spiral in the S direction. Spinning should therefore be done in this direction because… and this is where the explanations are never hugely clear. Perhaps the fibres are meant to mesh together better? or maybe it’s just a waste of twist energy to remove it before spinning the other way? I do know that many archaeological finds and museum pieces of linen dating back over the centuries have Z spun yarns, so it’s clearly not essential for an item’s longevity. Upon examining flax fibres under my own microscope, and looking at better quality pictures online I cannot make out any twist (unlike with cotton, whose fibres are noticeably flat and spirally). Perhaps the twist is at a macroscopic level, but it is not evident in the strick or top I have, and I am not sure that a very slight spiralling would make any difference to which way the fibres should be spun. The few experienced flax spinners I’ve spoken to have all said that in their experience it makes no difference which way flax is spun. As for the different spiralling direction in the northern and southern hemispheres? I am afraid I’m unable to visualise the difference in the sun’s path across the sky to figure out whether it’s even possible that this is true.

Using water

Almost all sources agree that flax should be spun wet for a smooth yarn, and this has certainly been done historically at least since the invention of the spinning wheel, as flax wheels often have a little bowl for the spinner to put water in so she can wet her fingers as she works. There is some evidence that flax was spun wet as far back as ancient Egpyt. There is a little debate about exactly where the water should be introduced. Some sources say simply wrapping the fibre in a damp towel is sufficient, whereas others say the water needs to be added exactly at the point of twist, and if added after this point any smoothness is only temporary and will go away upon wet finishing, leaving a yarn as hairy as if no water had been used at all. If water is introduced too early, it makes drafting difficult. The reasoning behind this rule is often omitted, I’ve seen it claimed that flax has a natural ‘glue’ on it which this water awakens, I’ve seen people say this ‘glue’ is pectin, but I thought the pectin was all removed during the retting process. I’ve also seen people say that it just helps bring the fibres together to allow the loose ends to be incorporated into the yarn, which makes most sense if the exact point of water addition is critical; I’d have thought if some sort of glueing was going on then it would care less about where the twist was, and any effects would be negated after the long boiling process that is normally done while wet finishing.

The sampling
(click any of the images to bring up a hi-res version)

I have some of the beautiful flax stricks from Berta’s Flax, from a woman named Maria who is 90 years old.

P1070592

She has carefully looked after this flax from her dowry chest for decades, and while I do want to spin it and not just hoard it away for decades more, I want to do it justice, so my experiments are on readily available commercially processed flax top. While the base fibre is the same, flax top and line flax (strick) are very different. Line flax has a very long staple length of a foot or more, all the seconds (tow) have been removed during the processing, leaving only the longest fibres. Flax top is processed on the same machines that are used to process wool, and while some of the tow is removed, all the fibres are far shorter, in the range of 3 inches. This makes it both easier to spin for beginners as you don’t need to wrangle a distaff to control the very long staple length, and can work with your hands close together like for wool, but harder to get a fine even yarn as there are lots of shorter parts and clumpy bits, and it’s slow going. The stuff I have also happens to have been bleached.

In spinning my samples I decided to not worry too much about consistency. I pulled out any really large clumps from the top, but if the odd one got through, or if a part got thinner than I expected I didn’t worry about fixing it.

My samples are as follows.

1) Spun dry, Z twist

This yarn was spun with a modified short forward draw, allowing a little twist into the drafting zone to allow for a longer and faster draft. The yarn is very hairy, and fairly weak. I was able to wind it onto a niddy noddy without breaks, but had a couple when I tried to unwind a strand for my records without undoing the skein ties. None of the other samples broke when I did this.

2) Water added after point of twist, Z twist

This yarn was spun with a shorter draw and less twist in the drafting zone than the first yarn, with the fingertips of my drafting hand wetted. The twist was introduced to the yarn in the drafting zone, and water just beyond this. Every few inches I also ran my hand up and down the yarn to ensure it was evenly dampened.

3) Water added at point of twist, Z twist

This yarn was spun using a traditional short forward draw with no twist in the drafting zone, and wetted fingertips of the drafting hand introducing water at the point of twist. It was a very slow process due to the short staple length of the top.

4) Water added at point of twist, S twist

This yarn was spun exactly the same as above, except with twist in the opposite direction

5) commercial linen yarn

13nm bleached linen thread, no idea of supplier I’m afraid!

Thoughts so far

I’m not ready for conclusions yet, as the yarns have not been wet finished. I plan to boil them for an hour, and if the water is dirty after that, to add washing soda and boil some more.

So far though the dry spun yarn is far far fluffier and weaker than the other three. The ones with water added at point of twist seem slightly smoother than the other, but this may not be a fair comparison as the other was finished a few days before so has been subject to more abrasion being dumped in my knitting basket and played with from time to time.

And wow! the microscope makes even smooth-seeming yarns look fluffy!

There is no noticeable difference between the S and Z spun yarns.

Clicky for part 2

Spinners’ Control Card

I made this back in 2009, and hosted it on flickr. They kept on changing their resizing algorithm so it wouldn’t print right, so I hosted it elsewhere but didn’t really make it easy to find. From time to time people ask me about it, so here it is in easy to locate format!

It is for helping with consistency in handspun yarns. Use it regularly while you are spinning to check your WPI and ensure it doesn’t vary throughout the project, then use the chart on the back to figure out what sort of yarn you’ve made. Or you can ‘work backwards’ and decide how thick you want your final yarn to be, and work out how thick your singles need to be to get that end result. Don’t forget to swatch though, as your fibre choice and spinning technique can mean your yarn thickness changes drastically during wet finishing.

hiresscc

To use, click the above image to open the full size version, then save and print without resizing. It should be 11cm square at 300dpi. Check the one inch section does actually measure an inch, then fold in half and hang from your wheel. You can laminate it if you like to make it more hardwearing, but mine tend to go walkabout before they wear out!

Indigo vat from fresh Japanese indigo leaves

As I explained in my last post, this year I have been growing japanese indigo from some seeds I got with some pretty cards. I tried the ice extraction first as it seemed simpler, and after having such good results with that I decided to stop feeling daunted and give a proper vat a go. There are many recipes online for indigo vats, mostly from dried indigo, and I started to get a little overwhelmed with all the options. It didn’t help that almost all the instructions were along the lines of ‘for X indigo powder you need Y this and Z this’, and not having indigo powder, that wasn’t helpful. So I decided to think about what actually is going on, and how I can achieve that.

The first step is extracting the indigo from the leaves. I didn’t need a flocculating agent, which is what makes the particles clump together and fall out of suspension, as I was planning to use the vat straight away, so all I needed to do was get the pigment out of the leaves and into the water. I decided the easiest way was to fill my dyepot with hot tap water (at 50C) and chuck the leaves I had into it.

After 24 hours the pigment should be out of the leaves, then I’d need to get rid of the plant matter and raise the pH of the vat. I have washing soda and caustic soda here, and decided to go with the latter, as the former is a rather weak alkali. I was unsure how much to use, then found this chart. I calculated how much water was in my vat (around 8.5l) and knew I’d need in the region of 10g to get the pH where I wanted it, which is around 10-11.5 for cotton (8.5-9.5 for protein fibres). It was at this point I realised that all the info I’d found about how much alkali and reducing agent per X of indigo, well, it actually didnt matter how much indigo was there, the important thing was how much water there is, as that is what affects the pH and contains all the naughty oxygen we want to get rid of (futurevampy says this isn’t quite accurate, but never mind!). So, again following the chart linked above, I decided I’d need around 30g of hydros (Sodium Hydrosulphite/Sodium Dithionite) which I’d picked up from Willo Fibres at FibreEast.

Okay, the plan was formed, I understood in general terms the chemistry of what was happening, now all I had to do was get on with it.

I picked all my remaining indigo, which wasn’t as much as I’d have liked; 970g total, around 350 of which was stems. Next year I will grow far more!

P1270277

I pulled all the leaves off and put them into the pan and covered them with hot tap water at 50C. The pan was placed in a plastic bucket surrounded with wool packaging material (I got a bunch of it on freecycle from someone who gets lots of food delivered insulated with it), put the lid on and put more wool on top, then left it in the greenhouse.

P1270279

After 24 hours, it looked like this, with a nice metallic sheen on top. The fabric you can see is a bit of muslin I used to wrap the leftover leaves from the ice extraction in; I wanted to get the remaining colour out of them without filling my dyebath with tiny bits of plant. It was still pleasantly warm, wool is a really good insulator.

P1270286

I fished out all the leaves into a mesh bag, and was left with turquoisey coloured liquid.

P1270288

I made sure to squeeze all the liquid out of the leaves into the dyebath.

P1270289

This darkened it considerably

P1270292

The dyeing process is faster at higher temperatures (so long as you don’t go over 60C as this will destroy the pigment once it’s been reduced), so I got to play with my new toy, a portable hotplate I can use in the utility room/garden when I don’t want to make mess in the kitchen or do stinky plant stuff indoors. I managed to heat it up to around 40C before excitment overcame me and I moved on to the next stage.

P1270294

The next stage was to get the pH to a suitable level. I have UI paper, and also a very handy pH meter that I bought to check my tomatoes are acidic enough when canning. I calibrate it before using for that, but for this I didn’t bother, I just checked my tap water was around 7 and called it good enough.

From my reading earlier, I’d decided to use in the region of 10g of sodium hydroxide. I put some of the dyebath in a mug and added just over a teaspoon of it, and stirred until it had dissolved, then poured it into the dyebath. Testing revealed the pH was 10.8. Perfect. On adding the alkali, the dyebath turned a dark green colour.

I took it back outside and aerated it by repeatedly lifting some out and pouring it back in. I did this for a few minutes until I was bored and my arm was tired.

P1270298

I then added the hydros. I gave the bath a stir to create a vortex, then poured in about 30g, I didn’t weigh it, just estimated. I stirred it a little then put it back in the wool-lined box in the greenhouse for an hour.

During that hour I prepared my fabric. I decided to dye some muslin, some cotton tote bags, and some shibori thread. I put the fabric through the wash the night before to make sure it was scoured, and washed the thread by hand with some washing up liquid. While my dyebath was reducing I took this clean fabric and had fun with tying it in various ways.

P1270300

After an hour, it was time to go! The dyebath was a bright neon yellowy green, with more metallic sheen on top. I tried to move this top layer out of the way before dyeing, with partial success. The bits that remained didn’t seem to affect anything negatively though.

P1270301

I put my stuff in, squeezing as much air out as possible and holding it tightly in my hands before placing underwater and letting go. I decided to go for volume rather than depth of colour with this first attempt as I’d like to have enough fabric to make a dress out of. I left the stuff in for 10 minutes at a time before removing gently and allowing to oxidise, and then returning to the dyebath. Here are a few more pics.

Green dyebath:

P1270303

P1270307

Out and mostly oxidised. The thicker fabric at the hem of the bag has more liquid in and is still greenish coloured

P1270306

Drying things

P1270316

P1270313

P1270312

P1270311

P1270308

P1270318

And the first lot dry. It’s paler than I was expecting, but it’s a lovely sky blue colour, so I’m happy with it.

P1270319

I’ve now, about 8 hours later, just put the whole lot in the washing machine on a quick cycle to rinse out any excess dye, and I’ll try and update this post with photos once it’s all dry. The dyebath isn’t fully exhausted I don’t think, so it’s back in the greenhouse. Over the next couple of days I will try lowering the pH and dyeing some wool in it, and perhaps adding some synthetic indigo and having a try for deeper colours.

I will definitely be growing japanese indigo again next year, and if I’m lucky I’ll get another harvest this year. It’s been a really interesting and fun process, and I just love the colours it gives.