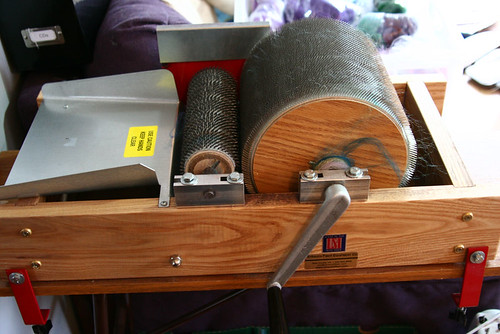
This post will explain one method I use to card raw fleece on a drum carder. The basics of using a drum carder are explained in this post, and future posts will cover blending of fibres and cleaning of the carder.
The method outlined below is time consuming, preparing the fleece before carding is a lengthy process, and the amount of pre-preparation needed depends on the state of the fleece, and the desired end result. This is not the fastest way of doing this, but it’s the only way I’ve found that works with fleeces with dirty tips or lots of VM.
First, your fleece needs to be clean. Using a drum carder with unwashed fleece will get your carder very dirty and covered in gunge that will be hard to remove and will contaminate future batts. It may also damage your carder. A fleece washing tutorial will follow, but there are plenty of others already out there online.
The fleece I am carding in the below images is a cormo fleece. It was a coated fleece so there isn’t much VM, but some of the tips were caked with mud, and I didn’t want this mud to get into the batts. In the below pic you can see a lock of the fleece, with its dirty tips, and also a few nepps at the butt end (which are a common feature of lots of raw fleeces). [clicking on any of the pics will take you to a larger version in my flickr account].
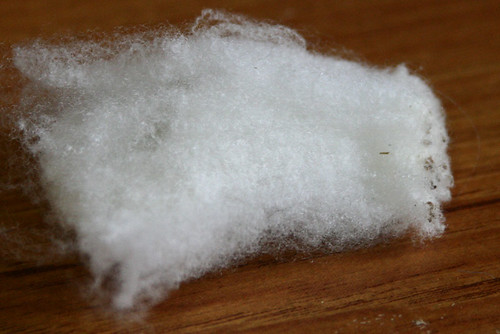
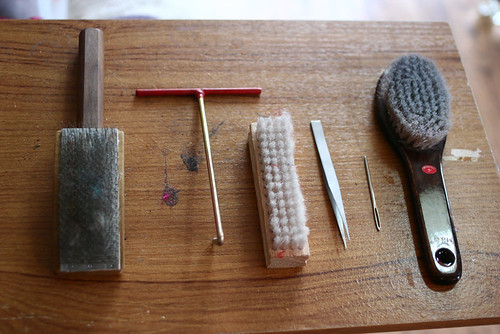
I don’t want any of the bits of mud, or the nepps, in my final batt. It’s very difficult to get a completely nepp-free batt, especially with a wool as fine as cormo, but the method shown helps get out as many of them as possible before carding. To remove the dirt and nepps (and any VM), grab the lock about half way down the staple, and run it over a hand carder laid flat on your lap. You can see that the bits are gone, the wool is fluffed up, and there’s a few lumps left behind on the carder. If the fleece had VM in, most of this would also be trapped by the teeth of the carder.
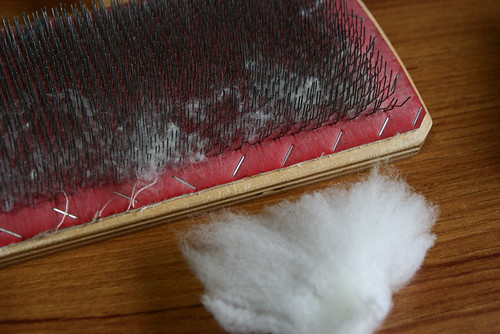
Turn the lock around, and repeat the process to detangle and remove any nepps from the bottom end. Repeat this process for as long as your patience will allow, or until you have enough fibre to make a batt.
Place your opened up locks of fibre on the feed tray of the carder. Don’t overfill the tray, you should be able to see the tray through the fibre.
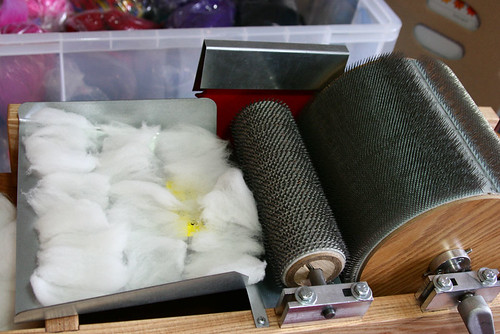
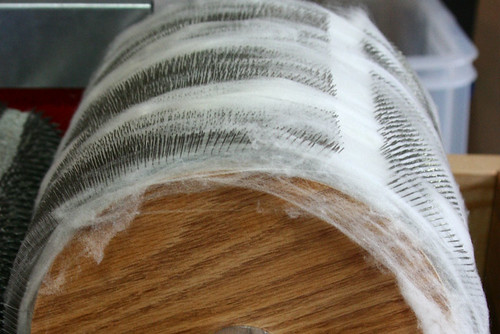
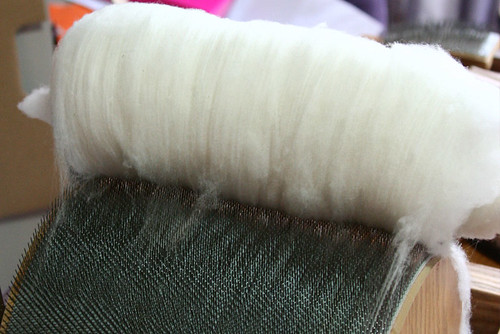
Slowly turn the handle of the carder with one hand, while using the other to gently guide the fibre towards the licker in drum. Don’t pull on the fibre, just hold it in place while the carder pulls it in. The fibre will wrap around the large drum in thin layers. If you’re using a fine fibre like I am, you will probably find it doesn’t want to sink to the bottom of the teeth, and there will be patches of wool close to the top of the teeth like this.

If there are any noticeable lumps or bits of unwanted fibre/VM close to the top of the teeth, pull them out now, then use a hairbrush or similar to push the fibres down while turning the drum.
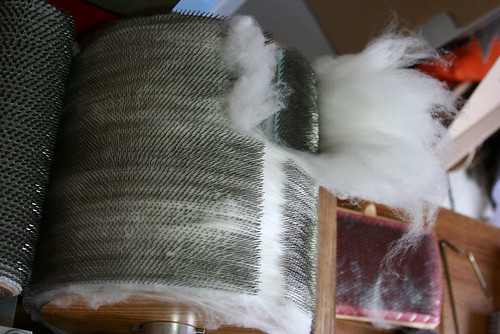
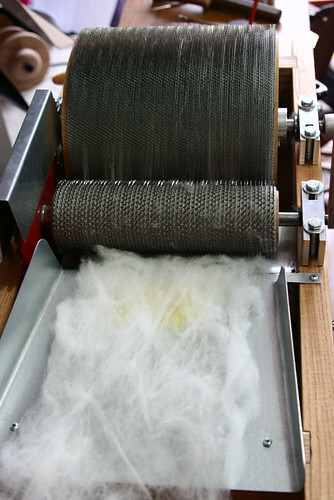
Add more fibre to the feed tray, and repeat this process several times, until the carder starts to fill up. You may find that some fibre wants to fall off the edge of the carder like in the below image. For the first pass on a raw fleece, I ignore this, provided it doesn’t start to get near the axel or moving parts of the carder. If it does start to go to places it’s not wanted, pull the fibre up and either place it on the edge of the drum, or pull it off and put it back in the feed tray, and in future try to feed the fibre a cm or away from the edge of the tray to stop it happenening again.
Once you’ve run out of fibre, or when the drum is starting to get full, you need to remove the batt. Use your doffing tool (mine is called a ‘knuckle saving batt pick’) and came with the carder…a knitting needle can be used too, but watch your hands on the teeth. At the break in the card cloth, use the tool to free a small section of fibre at a time, you shouldn’t have to pull hard, if you do, you’re trying to do too much at once.
Once you’ve severed all the fibres, run your tool along the gap to make sure there are no more small areas of fibre joined together, then you’re ready to remove the batt. Roll the batt off the carder (some people suggest to roll it around a rod, I’ve never found this to be necessary), keeping your hands as close to the carder as possible to pick up as many stray fibres as you can. You’ll see the drum is almost completely clean, the few straggly fibres which are still attached will be picked up as you roll. On the first pass, there may be a few fibres which aren’t joined to the rest of the batt that want to stay deep in the teeth…remove these after the batt is taken off by running your flick carder over the drum.
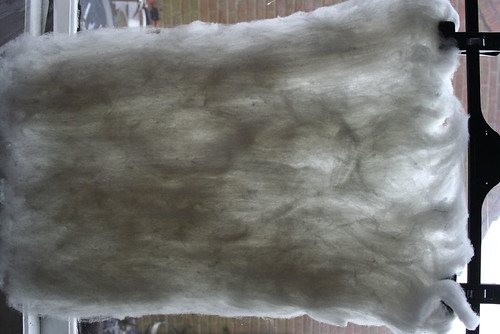
When your batt is off the carder, hold it up to the light and have a look at it. You’ll see the wool isn’t even at all, there are clumps, and areas where the fibres don’t run parallel…and you’ll also see in my batt, despite my best efforts, there are a few nepps. I am fairly sure these were always in the fleece and weren’t caused by me trying to card too much at once, or being too rough, though with a very fine fibre, you will start to add nepps however careful you are.
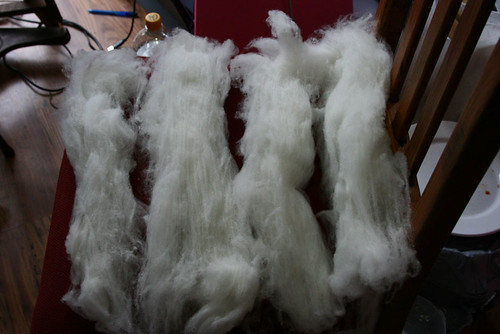
Take your batt, and tear it into strips lengthways. Each of these strips will be fed through the carder again. In the photo, the strip on the left is small enough to be recarded alone, the others were split in half again before carding.
Take one of your strips and spread it out flat between your hands, so its about the same width as the feed tray, then recard it, the same as before, turning the handle slowly, and using your hand to guide in the fibre.
Repeat this with the rest of the batt, then again remove the batt and hold it up to the light. You’ll be able to see the batt is more even, with fewer fibres travelling in the wrong directions.
Tear this batt into strips, and repeat, until you are happy that your fibre is carded enough. I did one more pass, making 3 in total, and I may do another one, but I don’t want to add more nepps.
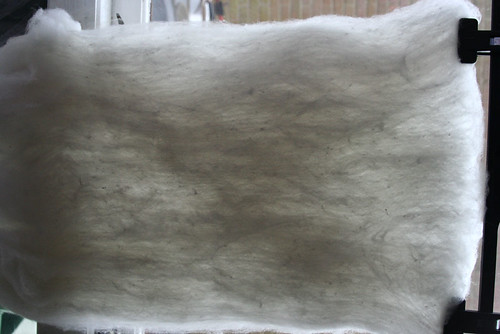
My batt after 3 passes is looking a lot more even.

And that’s it…your batt is ready to spin!
A note on different methods.
If your fleece doesn’t have dirt, lumps, or VM in, you don’t need to comb the locks before carding unless the fleece is matted together. If the fleece is light and airy, you can just grab a chunk of it, and pull apart with your hands to separate the fibres. You will end up with a light and airy cloud of fibres, which can be fed into the carder in the same way as above. As the fibres will not all be parallel in this cloud, you’ll need to do several more passes to get it smoothly carded, I find normally around 6 passes gives me a lovely even airy batt.
If your fleece is clean but a bit neppy at the butt end, you may decide you don’t want to remove the nepps, to give yourself a textured yarn. Again in this case you don’t need to spend time combing them out, just fluff up the fibres and card, and the nepps will be incorporated into your batt.
Thanks for reading…any comments are welcome, and questions will be answered in future posts.