Indigo dyeing ice extraction method

I’ve done loads of acid dyeing, and a little bit of natural dyeing, but I’ve never dyed with indigo before. This year I decided to grow some woad, then did a little research about how much pigment it gives and worked out that with an average yield I’d need around 7 plants worth of leaves to dye a 50g skein of yarn. I didn’t want to fill the entire garden with woad, so decided to hunt for something a little stronger. It just so happened that a couple of days after I made this decision, these lovely cards with free seeds were advertised on ravelry. I bought the japanese indigo and madder ones, and soon had lots of lovely seedlings. The madder won’t be useable for another year or two, but the indigo has been ready for its first cutting for a while. I realised I’d been putting it off as the idea of making an indigo vat was a little daunting; there are so many methods, so many people reporting problems, so many things to check. I couldn’t even decide if I wanted to dye immediately or extract the pigment for later, and I didn’t want to waste my precious leaves by messing it up. Eventually I realised I’d better get on with it or the amount of pigment in the leaves would start to drop as it got closer to flowering time, and after a little reading around I came across the ice extraction method, which seemed quick and simple and gives more turquoisey results than a standard indigo vat. I couldn’t find anywhere that explained the chemistry of what is going on with this method, so I followed instructions a little blindly, but it worked out well in the end. This is what I did.

First, I prepared everything indoors. All the websites I read stressed the need to get this done quickly, and keep everything ice cold, so I figured getting everything ready first was a good idea.

I put a couple of cups of water in the food processor along with a few ice cubes

P1270248

I got a bucket with a few inches of water in and again put a few ice cubes in

P1270249

I wound the yarn I was using, and put it in to soak in cold water. I wound off a skein of wooltops poldale/nylon sock yarn into five 20g minis, and also grabbed some silk yarn that had been lying around for years to use up anything left in the dyebath after doing the sock yarn.

P1270250

I set up a way of straining the liquid into a vessel. I decided to use my stainless steel dyepot even though it’s way bigger than I needed simply because it was there and easy to use and clean. I then lined a sieve with a mesh lingerie bag that I use when I wash fleece.

P1270251

Once everything inside was set up, I headed out to collect some indigo. Our growing season here in the UK isn’t long enough for indigo to flower and make seeds to use the next year. I’m trying a couple of methods to get round this, the first being simply growing in the greenhouse. The second is growing in a pot, which I can bring indoors when it starts getting colder outside. I read that the greenhouse plants should have more pigment in, and I didn’t want to waste the best stuff, so I decided to go with the pot-grown plants (you can see the madder in the pot on the left).

P1270252

I cut a couple of bunches of stems and put them into the bucket of cold water. I don’t know if this is necessary, but I figured it couldn’t hurt.

P1270254

It’s perhaps 2 plants’ worth, plenty left for next time, and of course it will carry on growing for a second harvest in autumn. I weighed the leaves once I got indoors, and ended up with 270 of plant material, 90g of which was stems. These numbers aren’t completely accurate as there were some water drops on the plants as I weighed them, but they give a general idea.

P1270255

I took the indigo back indoors and began stripping the leaves off the stems and putting them in the food processor.

P1270257

Once it was full, I turned it on and gave the leaves a rough chop to make more room. I repeated this a couple of times until I was out of leaves and left with this lovely green goop.

P1270259

I poured this into the strainer and then squeezed the mesh bag to get as much liquid out as I could. The squeezing produced a large amount of bright green foam as well as the dark green liquid.

P1270260

My dyebath was ready! I squeezed the water out of two of the miniskeins (which I shall imaginatively name 1 and 2) and dumped them in, squishing them around a bit to make sure they were fully saturated.

P1270261

It was at this point I knew I did indeed have some indigo pigment in there, as my nails were starting to turn blue.

P1270262

After 10 minutes, I took the skeins out and squeezed out as much liquid as I could, then added skein 3 to the dyebath. A minute or so later, I put skein 1 back in.

Skein 2 looked like this, and my mesh bag must be made of nylon as it is also a lovely shade of blue

P1270265

While waiting for the next skein to be ready, I cleaned up, including putting all the used leaves into a jar. I’ll finally be brave enough to make a fermentation vat soon, and these will be added as I’m sure there’s some pigment left in them

P1270266

After a further 10 minutes, skein 3 came out for good, skein 1 came out and went back in, and skein 4 was put in.

P1270267

After 5 minutes this time I removed skein 4, leaving skein 1 in for a bit longer and adding the silk yarn.

Here’s skeins 2, 3 and 4 side by side straight out of the dyebath

P1270269

I left skein 1 in there for another half an hour or so, and after an hour I gave all of the skeins a rinse in cold water to remove any excess green dyebath that wasn’t actually bonded to the yarn. The silk is still drying, but the sock yarn is done!

P1270272

To recap, left to right

1. Stayed in for about an hour in total, removed and squeezed out from time to time
2. First dip. 10 minutes
3. Second dip. 10 minutes
4. Third dip. 5 minutes
5. Undyed

This shows that most of the pigment was sucked up in the first 10 minutes by the first two skeins that were in there. Not much extra pigment was added to skein 1 despite it being in the dye far far longer than the others. There was enough left to give very pale colours on the later skeins though, giving a lovely gradient.

It was a very easy process, and far less daunting than a vat I have to test the pH of and really aereate at one point but be very careful not to aereate the rest of the time, and it gives lovely colours. I will be brave enough to do a proper vat soon though, I want to try getting some darker blues, and I also want to try working with cotton, which I didn’t try at all today as I read that this process works way better with protein fibres.

Garden evolution

So yeah, I’m an awful blogger, I’ve done a million things and not blogged about any of them. So, in my usual style, here’s a quick round up of what’s changed in the garden this year.

My previous lodger was very anti-garden, he used to say that given the choice he would concrete over the lot, so it’s been so nice to have someone who can actually help me do things. All the manual labour in the following projects has been provided by J, but I did all the things that can be done while sitting down, the planning, planting of seeds, and the ‘supervising’!

First, we relocated the chickens. They’d turned their area to mud, so we moved them onto a clean area of lawn, planning to re-seed their bit. The plans changed somewhat as we went along, so the layout is different now, and we’ve still not moved them to their final place, but the garden is looking nicer now, and we have an extra small raised bed.

The area has gone from mud to being covered in grass and overrun by a giant pumpkin plant in just a few months.

P1010990
P1020001
P1020302
P1020912

Our major project has been a new greenhouse (shut up, we DO need 4 greenhouses!). I saw this one offered on freegle, and while it needed a lot of work, it was freeee, so we went and picked it up. It wouldn’t fit in the car, so we had to saw each panel into 3 and reattach at home, but it was totally worth it. We also managed to score some extra bits of glass on freegle to replace the ones which had been broken.

All it needs now is a bit more putty round a couple of the windows, one pane of glass adding to the door, and for me to design and build a vent. I have the timber for it, but I’m still procrastinating about the best way to do it that’ll let it open easily and still be watertight when it’s shut. I finished building the bench in there today and moved my Abutilon, chillis, and a grape vine in there. Hopefully it’ll be the least drafty of all the greenhouses once it’s finished, so I can keep my non-hardy things over there in winter, and maybe move the heater in there if it still gets too cold.

P1020164
P1020894
P1020918
P1020896
P1020900

The front bed which is home to my cherry tree had a makeover and was turned into an alpine/succulent bed. It’s filling out really nicely now, and I made a little succulent wall hanging to go above it.

P1020125
P1020903
P1020902
P1020366

I also got to see a sempervivium flower for the first time. Of course it was one of the ones in the wall hanging that decided to do it, so the flower went all curvy trying to get vertical, but it still looked pretty.

P1020541

We harvested lots of things, and even remembered to photograph a few, including my first ever honeyberries!

P1020529
P1020729
P1020748
P1020785
P1020807
P1020852

We are currently overrun with cucumbers and trying to give them away to everyone we know. But hardly any tomatoes yet, only a few cherry ones, the late winter has set everything back, and it’s not faaaair, I want my tomatoes now, they are doing SO well. There are also baby peppers and melons hiding under the mass of foliage in the greenhouse.
P1020904
P1020909
P1020910
P1020911
P1020907
P1020908

The pond was looking very unhappy earlier in the year, there’s a tree behind my garden which fills it with leaves every autumn. I had the gross job of pulling out piles of rotting leaf muck, and then I put in a water lily and some oxygenators, and the water is now clear, and the newts are very happy. This autumn I must remember to put a net over it.
P1020916

In unrelated news, I finally got a new car. I loved my old car, but the windows didn’t work, the locks didn’t work, and every MOT it needed more and more work. My parents are getting a new car and decided to give me their old one, but in the end they swapped their old one for something that was cheaper for me to run. The man at the dealership was unsure as to whether I’d be able to fit an 8ft length of timber in, which is clearly of prime importance, so I made sure to get some roof bars too. And now I have a cute little mazda 2 that has working windows! and actually locks! and has a CD player rather than a tape player! And, my absolute favourite thing: air conditioning!!!!! I looooove my car.

P1020917

And my final new thing, bought with a combination of birthday money and destash proceeds…a 20″ ashford knitter’s loom. I’ve only had it a few days, but I’ve managed to make a teatowel (best teatowel ever!) and a scarf. I was concerned that it was going to be too physically hard for me, and using it on the stand was very tiring and hurt my back, but I figured out a way that I can use it while sitting in bed, by propping up the end on a plastic box, and it’s much easier to use that way.

P1020922
P1020857
P1020919

Huge garden update

So it was winter. Then it was more winter. Then I was beginning to lose hope that we’d ever see temperatures above freezing, then all of a sudden IT WAS SPRING. I prepared a little by planting many seeds indoors, and set up a complicated hardening off system involving moving seedlings from indoors, to one greenhouse, to the other, then finally to outside, but I couldn’t actually DO much out there until a couple of weeks ago as the ground was frozen solid.

But this is (as much for future-vampy’s information as your edification), the state of my garden as of today.

Firstly, a couple of months ago I exchanged some Tesco clubcard vouchers for Thomspon and Morgan vouchers, and tried to take advantage of as many special offers on their site as I could so I could pay some attention to the non veggie part of the garden. Here’s what I ordered. All pics are taken from the T&M site, but I am sure they won’t mind as this is good advertising for them…so buy your plants from them, they have awesome bargains!

Firstly, I ordered some perennials from their collections. The plants you get are teeny tiny, but I don’t mind, I put them in pots in the greenhouse to get big and strong before planting out. I got a similar pack last year, and aside from one plant that got eaten by slugs, all are doing well. I got:

A Coreopsis Sunray
B Echinacea Magic box mixed
C Scabiosa blue jeans
D Digitalis Foxglove dalmation peach
E Papaver pizzicato
F Silene Jack flash

A Coreopsis Sunray
B Gaillardia Arizona Sun
C Scabiosa Blue Jeans
D Papaver pizzicato
E Silene Jack flash
F Aquilegia Swan mixed
G Gaillardia Arizona Apricot
H Delphinium Pacific Giants
I Lavender Munstead
J Heuchera Palace Purple

perennial collection

The pic isn’t actually of the actual things I ordered cos they substituted some, or I didn’t download the pic when I ordered and they changed the pack or something, but it’s all good, I love everything I have. Well, except the foxgloves, and that’s not for any aesthetic reasons, but because bees hide in the flowers and then come out buzzing ‘HI THERE I AM A BEE’ and scare the life out of me. But I like bees and I like them being around to pollinate my things, so it’s a good thing really.

I also ordered lots of seeds. I didn’t bother making a photo of the veggie seeds, cos I know what veggies look like, but I’m still very much a novice with flowers, so I stole the pics so I knew what to expect. These are all planted, and most are doing well, although there was an unfortunate incident involving lizards roaming around in the greenhouse and deciding that clambering all over my seedlings was more fun than sunbathing on the rock or eating the greens planted especially for them, so there were several casualties. Hopefully I’ll still have at least one plant of each variety, if not, I guess I’ll have to plant more seeds next year.

flowerseeds

I went outside to potter and do a few chores and get some pics of everything. LOTS of pics. So erm, here you go. pics because it did indeed happen.

As ever, the bed beside the back door is the most finished, and has the earliest blooming flowers, so it looks pretty good already:
P1020026

The herb part is in need of a few additions, i have flat leaf parsley, coriander, and basil all growing on my bedroom windowsill waiting to go out:
P1020027

I have my first hanging basket! I was scared of them before cos i know I am rubbish at watering stuff in summer, but with it being fleece lined and having a water holding sheet in it, fingers crossed it’ll survive:
P1020052

The chickens have been temporarily relocated to the lawn area so we could reseed their area. The honeysuckle and rose are having their first year of not being cut back to the ground, and are enjoying climbing the arch:
P1020100

We decided to move things around a little and put the swing seat against the hedgerow, so the chickens’ fence will go in a different place to before, which is a bit annoying, as we planted the line of daffodils along the old fence, so they are gonna need relocating. The new layout at least means I could squeeze in another bed next to the greenhouse, for our squashes. At the moment there’s a courgette planted in the ground under the cold frame, and I moved the peas in pots in there to get a bit bigger before planting out. The straw is down to hopefully keep the grass seed moist enough to grow:
P1020046

The view from the swing seat:
P1020073

I got some water damaged floorboards on freecycle a while ago, and made a nice 3 compartment compost bin to replace the circle of chicken wire I was using before. J dug out the compost for me, and there were several barrowfuls of really good compost at the bottom, which have been put into the greenhouse and a couple of the beds. And there’ll be more to come next year!
P1020070

The back bed is next on the list for adding more plants to. J bought me a dicentra and put it in the other day, I looove it. The pond isn’t so happy, too many leaves fell in it from the trees in the garden behind, so I spent ages fishing them out and pulled out a ton of rotting leaf mud gunge from the bottom. I recently put in some more oxygenators and a small red waterlily, so hopefully the algae will clear once the lily grows. It’s not toooo unhappy though, I did see a few newts in there the other day:
P1020065
P1020066

One of the best things about going outside is checking the chicken house:
P1020067

I love all the different colours, even if they do end up a bit poopy. I kinda want a chicken that makes blue eggs:
P1020068

The veg area is looking very bare, it’s too early to put most things out. The broad beans have been there over winter and aren’t doing too well, i think they got snowed on too many times:
P1020047

The asparagus is doing okay though, plants here range from 1-3 years old. Not tooooo much longer to wait until we can pick it:
P1020048

The fruit bushes in pots are pretty happy. They’re mostly blueberries, with a couple of honeyberries and a blackcurrant. The plan is to make a big raised bed and buy a load of ericaceous compost so I can have an actual blueberry bed:
P1020053

I wasn’t very good at picking celery last year. I am completely amazed that it survived the winter:
P1020054

One artichoke did awesomely at getting through winter. The others less so, though that might be related to cat digging rather than temperature. The blackcurrant bushes at the end of the bed are looking good, may even get some fruit this year, and the raspberries in the bed behind are running rampant as ever:
P1020055

Unfortunately the front patio is a huge big mess. It’s somewhere down the list to tidy:
P1020057

The sempervivium in the front bed is doing wonderfully though. It was growing on the roof of the garage, so I asked gren to get it down for me a couple of years ago, and planted it. It had a million babies, and this is one of the babies making baby plants of its own. There are at least 10 of them in this bed now, and they are great:
P1020059

At least my pots and canes are organised, even though there is mess everywhere else!
P1020060

We had too much garlic, so i stuck some in a pot, it seems happy enough:
P1020062

The easiest way to plant potatoes: Make a big mound in the centre of the bed, and plant a row of potatoes each side. Then when it comes time to earth them up, you can just push soil down from the mound and not have to find it from elsewhere or worry about hurting any potatoes by digging soil from around them:
P1020084

Stage 2 in the hardening off rotation, a cold frame inside a greenhouse. For a while I put a tube heater in here, but it’s getting warm enough now that it doesn’t need it. It has mostly peas in in this shot, but I moved them to an outdoor cold frame and switched things around:
P1020033

After moving stuff around in there…basil, sweet peas, beans, melons, broccoli, chillis, aubergines, and some rather leggy tomatoes that i left indoors too long:
P1020078

Here’s the greenhouse with the cold frame, kiwis, tobacco plants, tomatoes, and various other things in:
P1020038

The other greenhouse is full! This bed is the ‘lets grow some salad things before we need to put other plants in’ bed. It has radish, carrots, rocket, mizuna, spinach and chard in.
P1020040

Here’s some of the perennials from T&M in pots waiting to get bigger before going outside, and a couple of tomatoes to the right that were started off under a grow light indoors, along with the tobacco:
P1020041

More perennials, tobacco, sunflowers, marigolds, and tomatoes. And maybe a couple of other things:
P1020042

It’s a hard life being a cat:
P1020045

Especially when someone covers up the catmint to stop me lying on it. This is the first time I’ve managed to keep catmint alive without the cats trashing it. Yay for hanging basket covers and tent pegs!
P1020086

Do you mind? Taking cat drugs is serious business, do not interrupt!
P1020099

Hey, I want in on the drugs! the lavender in the back of the pic is from one of the T&M perennial packs last year. It’s doing really well.
P1020075

How dare you come near my run without bringing food!
P1020096

And now some closeups:

The hebe my dad got me last year:
295977_10150437948938179_1761394669_n

Pear tree:
P1020032

The kiwi plants have leaves, and pink balls. I assume the balls are going to become flowers, so maybe we’ll get some fruit this year. I bought the plants last year and they were really small, so I guess I should look into whether i should allow them to fruit or not this year.
P1020036

The grape my dad bought me last year is alive, woo!
P1020037

I potted up some strawberry runners last year, I have no idea what we’re gonna do with them all:
P1020079

We took some cuttings from the rose last autumn just for fun, we got at least a 50% success rate, which is great, though again i have no idea what to do with them!
P1020080

HI, I AM MINT! CAN YOU SEE ME! NO? OKAY I’LL JUST GROW SOME MORE THEN!
P1020081

And a few more random flower pics:
P1020087
P1020088
P1020089
P1020091
P1020093
P1020094

Black olive bread recipe

The other day I made perhaps THE MOST AMAZING bread I’ve ever made. Unfortunately the recipe I started from was awful and made flour soup rather than dough, so I improvised a lot. I made it again today so I could write up the recipe for future awesomeness.

P1010821

Makes: 2 medium sized loaves, or 4 single (large) serving baguettes.

Ingredients:

575g strong white flour
1 7g sachet of yeast
2 tablespoons sugar
1 teaspoon salt
3 tablespoons oil leftover from jars of sundried tomatoes (if none available, use olive oil)
75g olives (approx 25), halved
350ml warm water (just above body temp)
Dash of olive oil
Handful of coarse cornmeal

Method:

(This is mostly written out in a way so my bf can understand it. You can of course knead the bread by hand or make other changes such as rising in the fridge overnight. Also, if you’re not my bf you won’t get killed in the face for making a mess. At least, not by me.)

1) Put all the ingredients into the large bowl for the mixer. Mix, using the dough hook, for 10 minutes, on speed setting number 2. The dough should be solid and slightly sticky, leaving the sides of the bowl mostly clean, but sticking if left to touch the surface for more than a second or so.

2) Turn out dough onto a floured surface. Put the dough hook into warm water to soak IMMEDIATELY so it’s easy to clean later. Use a little flour to rub off any dough that has stuck to the bowl and add it to the lump of dough, and knead a little so you can form it into a ball. Pour a dash of olive oil into the bowl and rub it around with your hand, making sure to get right to the top of the bowl to allow for growth as it rises. Put your ball of dough back into the bowl and turn it over a few times until it’s nicely coated in oil.

3) Cover with cling film and leave in the airing cupboard for an hour, or until doubled in size.

4) Turn dough out onto floured surface, and punch down, then form into loaves/batons. Squish the dough out into a rectangle, oriented lengthways in front of you. Fold the bottom 3rd up, then the top 3rd down, and pinch the seam closed. Turn over and squish with your hands until it looks like a pretty shape. If you want to be really posh you can use a very sharp knife to make slits in the top.

5) Put a silicone baking sheet onto a metal baking tray, and sprinkle a handful of cornmeal over the baking sheet. Place bread on top, and cover with oiled clingfilm (lay clingfilm on cabinet, pour a couple of teaspoons of olive oil on, rub in with your hand, then invert and place over the bread).

6) Preheat oven to 200C. Leave bread for 20 minutes or until it doubles in size again. Put it in the airing cupboard to do this if the kitchen is cold, otherwise it’ll be fine left out on the counter. If any olive oil drips off the cling film onto my clean sheets in the airing cupboard I will kill you in the face.

7) Once the oven is hot and the dough is risen, remove the clingfilm and put it in the oven on the top shelf. Chuck half a mug full of cold water onto the bottom of the oven and immediately close the door. The steam makes the crust extra nice and crusty while leaving the inside moist. Cook for 15-25 minutes depending on the size of loaves you made. The bread is ready when it has a fairly dark crust, and sounds hollow when you turn it upside down and tap it.

8) Put on wire cooling rack for as long as you can bear, then EAT ALL THE BREAD. Once it’s cool, wrap in a clean teatowel to stop it going stale.

P1010810
All the stuff in the bowl

P1010811
The mixer doing its job

P1010812
Dough ball ready to go into the airing cupboard

P1010813
After rising

P1010814
After making into loaves, ready to stand for a while before baking

P1010818
Out of the oven. The 3 on the left are ready to eat, the one on the right was cooked for 10 minutes, and is waiting to cool before being frozen, will attempt to finish cooking from frozen sometime to see if I can have fresh bread whenever I want with no effort.

Homemade frozen pizza

We make pizza reasonably often, and since I got my awesome stand mixer for my birthday, I’ve been making more stuff in bulk. So we decided to make a load of pizzas and attempt to freeze them so we can have them whenever we want without all the hassle of waiting for dough to rise.

We mixed:

1kg 00 flour
2 7g sachets of yeast
1 tablespoon sugar
1 tablespoon salt
4 tablespoons olive oil
650ml lukewarm water

And then let the mixer knead it for 10 minutes with a bit of a rest in the middle. We covered the bowl and stuck it in the airing cupboard for an hour or so, then J cut up toppings while I made 6 strangely shaped bases. We made 2 pizzas as normal, but the ones we planned to freeze I put in the oven at 230C without toppings for 4 minutes to partly cook, then slid out onto cooling racks to cool for a bit before topping, wrapping in cling film, and freezing. I put a handful of coarse cornmeal to spread on the trays to prevent sticking, which also makes the crust taste extra nice.

UPDATE: We have made these several times now as they are SO good. To cook from frozen, preheat the oven to 180C and cook until the top is browned, about 18 minutes. These have ruined shop bought pizza for me as they are just so much nicer.

Pizzas ready to freeze:

homemadepizza1

Pizzas we ate:

homemadepizza2

The cost was flour – £1.99 (stupid waitrose expensive organic hippy flour), yeast – 20p, salt, sugar, oil – 30p, passata – 89p, sweetcorn – 40p artichokes, olives, sundried tomatoes – £1, mushrooms – 50p, green pepper 50p, mozarella 79p (reduced, woohoo!), cheddar 50p.

So yeah, I guessed some of the costs, and we weren’t exactly trying to keep it cheap, and the total was £7.07 for 6 pizzas! So it’s £1.18 per pizza! way cheaper than frozen pizzas from the shops, and with about 3 times as much stuff on!

In other news, my dragon is growing fast!!! so cute!

growthchart10wks

New vivarium

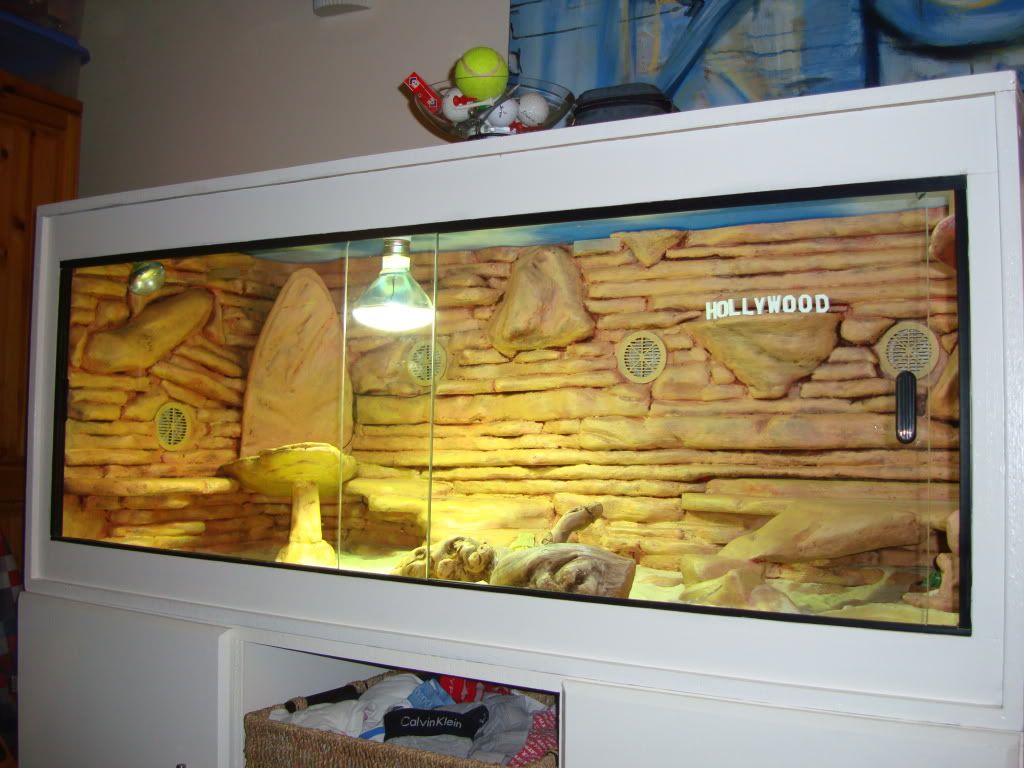
Currently all the babies (now 20! only one egg unhatched) are living in a small 2’6 vivarium. This is fine for them at the moment, means they don’t have far to go to get to their food/cool spot/basking spot. However when they are adults, they’ll need something bigger. Gren and I decided we’d look for a secondhand viv to house the two we are keeping, figuring we’d manage to get something within the next couple of months that was in our budget. As it was, I found this on ebay. 4ft viv with UV tube, ceramic heater, and 2 lightbulb fittings, and a cabinet to keep all the bits in (and raise it out of cats-eye-view) for £66.50. Score.

newviv

During my ebay hunting, I found this wonderful creation.

awesomeviv

If you have £279 burning a hole in your pocket, you can buy it here. However, with the £50+ it would take to get the UV and other light fittings, that was just sooo far out of our budget. But it’s so prettttty.

So I figured if that sort of thing is makeable, then goddamnit I can make it. I asked the internet how to make fake rocks for vivariums, and came up with all sorts of complicated stuff involving chicken wire and cement and soaking the end result in water for weeks to make the cement lizard-safe. And then thought ‘fuck that, I’d rather just make it out of polystyrene’. After a little more googling, it appeared that many people have done exactly that, including this awesome creation, which sadly I can’t credit as I can’t remember the forum I found the link on.

So I went to b&q, hoping to buy some of their small 25mm thick polystyrene sheets. However, the website lied to me, and they were out of stock of the small sheets, so I ended up buying a sheet that is 2.4m long and 1.2 metres wide. Awesome. The inside of my car however is smaller than 2.4×1.2m. So I had fun in the carpark breaking this enormous thing into 3 pieces that I could actually transport home.

I decided to put my skillz to the test and make a little climby basky thing the babies can use in their current viv to iron out any problems I have with the creation process before starting on the real thing. As I expected, while cutting this polystyrene with a stanley knife is easier than cutting the box I made the incubator out of, it’s still a pain in the ass, so I ordered a hot wire cutter to do the job much more neatly and easily. I also learned that b&q own brand PVA glue is a pile of crap. I dunno if I got a bad bottle or what, but the consistency was more like water than glue, even after vigorous shaking and stirring. So I cut my shapes out, used a combination of the crappy glue and cocktail sticks to hold the whole thing together, then covered with a layer of grout, then another later in the evening when that had dried, and I’ve just started on painting it, using acrylic paints, the plan being to use lighter shades of grey for each coat.

It clearly looks like rock, as the intelligent auto function on my camera decided it was a landscape!

After grouting
P1000712

After a coat of black paint
P1000716

first grey coat
P1000720

Total cost of this insane project so far:

Vivarium: £66.50
Polystyrene sheet: £6.98
Crappy glue: £3.50
Paintbrushes for grout: £3
Grout: £0 (the builders left a huge bag behind when they did my kitchen, woohoo!)
Hot wire cutter: £15.19
Paint: £7.34
Mirrors: £3.97
Total: £106.48

I’ll need to buy something to seal it with, either varnish or resin, I’ve not decided, and I may well need to buy more paint, and I’d like a circular thermometer I can incorporate into my planned design, but I think all the other bits I’m thinking of I can either make from the polystyrene or can salvage from things I already have, so fingers crossed it won’t cost me too much more.

So far my only ‘plans’ for the design are drawn really badly in a sketchbook, so you’ll just have to wait and see how it turns out and hope I remember to blog about it while it’s still a WIP.

Babies!

I think I probably forgot to blog about it, but these guys are J’s bearded dragons. He’s had Dizzy for a few years, and in spring decided to get a male to keep her company.

lizardlove

After a couple of months in separate vivs, and a bit of territorial behaviour, they decided to become friends and live together happily, then after a couple of weeks of mating behaviour…arm waving, head bobbing, beard biting, we realised dizzy was finally knocked up! We didn’t see the actual penetration the first time, but she was getting fatter and fatter. Then she started frantically digging in the sand in her viv. We took her out and put her in a box of damp compost, but she wasn’t very interested in it. After a couple of days of spending an hour in the compost box a day, she decided she was ready, dug a hole, and laid 21 eggs in it. We carefully extracted the eggs and put them in an incubator which I made from a polystyrene box with a heat mat attached to a thermostat in. Later I put a perspex window in and sealed it with silicone so I could see the eggs without lifting the lid. I put a dish of water in the box on the heat mat to get the humidity up (image below shows a small heat mat, we changed it to a larger one a few days in), and put the eggs in dents on the surface of damp vermiculite. Half the eggs we put on the surface in the orientation in which they were laid, and the other half we candled and put with the yolk sac up, as the internet disagreed on which method was best. Both worked fine for us. The crappy hygrometer we had measured the humidity between 80 and 90%, and we set the thermostat to 28 degrees C. None of the eggs showed any signs of mould, but they didn’t really seem to do much either, then after a few weeks we realised they were getting bigger.

inc

After 71 days, one of the eggs looked dented, but the others looked fine. We expected them all to dent shortly before hatching, but nope, just this one. On the morning of day 72 there was one baby hatched, and 3 more eggs pipped.

eggshatching

firstbaby

Now there are 14 babies! And they are so cute!

lizardpile

And in other news we harvested a lot of stuff from the plot. Potatoes, red onion, garlic, carrots, beans, peas, courgette and one squash

harvest

Monster garden update.

I’ve been rather remiss at updating the blog, and rubbish at keeping records of gardening stuff. It started out so well at the start of the year, I had a spreadsheet with all the plants and varieties and notes about when stuff was planted and how it was doing. Then it got to about april when stuff actually needed doing in the garden, and doing stuff took priority over making notes about stuff. So today I tried to catch up and went out and made notes on what I’ve got and how it’s doing.

First, here’s some pics of my garden from above. I have a flat roof on top of the living room, and J had never been up there, so we got out the ladder and went to have a look the other week.

Main part of the garden:
P1000257

Veggie area:
P1000254

Veggie area overflow:
P1000255

Onto today’s cataloguing of plants.
Conservatory greenhouse:
P1000440

Kiwi fruit. No variety listed other than it being self fertile, was £1.99 at the local cheap garden centre so I thought I’d give it a go. Doing awesomely, I kept having to add extra canes and move the vine as it was growing. Very fast vigorous grower, but no fruit yet.

Gherkin cucumber. No idea of variety, grown from seed by my dad rather late in the season. Very vigorous growth, plants are now taller than me, and mini fruits are just appearing.

Grape, cabernet. Incredibly vigorous growth, has easily doubled in size in the few months I’ve had it, is now growing along the greenhouse roof. The grapes are getting bigger too. wooooo.
P1000439

Pink passionflower. Grew from seed this year, will have to check the packet for the variety. Seems to be pretty happy, about 50cm tall now, no sign of flowering yet. Will have to see how it does over winter.

Kumquat and lime trees. Well, they are still alive and covered in leaves and making new shoots, and the lime flowered very very early in the year, but lost all the fruit. I think maybe I’m not destined to grow citrus plants, but I’ll see how they do if they stay in the greenhouse, as they were moved around rather a lot last winter between the house and both greenhouses.

Asparagus. Grown from seed to eventually plant at J’s plot. Seems very happy indeed, just put into bigger pots and will plant out in autumn or maybe next spring.

Globe artichoke. Left them in their mini seedling pots for too long, but finally moved into bigger pots and seem to be doing okay. I really should move them outside. I would plant them out, but something killed all the artichokes at the plot, so there may be a change of plan regarding their location.

Chillis: Gusto purple and cayenne are doing ok, leaves a bit yellow, but had a few fruit from each. Should probably feed them and see if that helps. Jalapenos are doing pretty good, mini fruits just starting to form. Krakatoa F1 is doing great, lots of fruit on a very small plant. I picked it up at a garden centre I went to with my parents and now I’m hoping it tastes nice and isn’t just crazily hot.
P1000438

Tomato: mini charm. Well, it’s certainly very mini, and has a fair few flowers, but not fruit yet.

Main greenhouse:

J has been working on the patio in front of it, so I can walk to the greenhouse without having to put shoes on! Just need to put down a load of gravel and the messy area will look so much nicer.
P1000434

Everything is growing nicely
P1000421

Plants, from left to right.

Cucumber f1 female. No variety name given. Bought at a garden centre because the ones I tried from seed didn’t germinate. Doing amazingly. We will be overrun with cucumbers in a couple of weeks, I picked one yesterday and had half of it for dinner, and it was lovely.
P1000417

Sweet pepper. Can’t remember the variety without checking it. Not very happy. I planted 2 plants here, but their leaves started to curl within days of being in the ground, I figured it was cos the chickens had been pooping in that soil just a few months before and there was too much nitrogen or something. The first plant is soldiering on, and had a couple of flowers, but the second was killed by slugs.

Tomato. No idea what variety, just a random plant I had left in the greenhouse I stuck in to replace the dead pepper plant.

Tomato Shirley. Lots of full heavy trusses of fruit, still all green.

Tomato. I can’t remember the variety. One I grew from seed…it was the first one I planted, but it appears to be later than the others to set fruit, so I have no clues what it is.

Tomato, beefsteak heirloom type. Will need to check my seed packets for the variety. Doing very well except it fell on me the other day cos the cane broke. Fruits are still very small and green, but there are lots of them. Some of them look like crazy mutants.
P1000420

Tomato, again forgotten variety. I think it’s san marzano. Being a bit overshadowed by its neighbour, but doing ok.

Cucumber, same as the first one. Had issues when it was just planted with something eating it and making holes in the leaves, but I sprayed a couple of times with washing up liquid solution, and it killed whatever it was, and the plant is now super happy. It’s a couple of weeks behind the other in terms of cropping, but will still give lots of fruit.

Aubergine f1 moneymaker. Not as big as I’d expect, or as big as the one in J’s greenhouse (which is cooler than mine cos it is missing half a roof). Has made a couple of flowers and has more on the way, so fingers crossed I’ll get a few aubergines off it.

Tomato alicante. Doing well. Lots of trusses.
P1000418

Tomato Roma. Will soon give me the first ripe tomato of the year. About time! has lots of trusses, but not many fruit on each. Am still expecting an ok crop though, as there are still flowers on it.
P1000419

Tomato Roma. A bit behind it’s neighbour, but doing well.

Watermelon. Can’t remember variety, but it doesn’t matter anyway because stupid slugs ate it, even with a ring of eggshell around it. Next year I’m going to grow melons in pots in the other greenhouse.

Outdoor tomato bed.
P1000422

From front to back, left to right:

2 unknown varieties, both grown from seed. The second fell over in strong winds so its a bit freaky looking and won’t stay up straight, but it’s still looking ok

Shirley/moneymaker. Both doing ok, lots of fruit

Tomatoberry x2. The second one died, I think due to being knocked over in the wind and the stem breaking. The other seems ok

Supersweet/floridity, 2 rows. The floridity have tons of teeny tiny varigated plum fruits, the supersweet seem to be doing ok too.

Other beds:

Telephone peas/trail of tears beans. The peas are doing great, we’ve had a good crop from them, and they are the nicest peas I’ve ever tasted…even when the pods are overlooked and they get a bit big, they still have the lovely sweet pea taste and don’t get hard and nasty tasting. They are coming to an end now so I’m trying to resist picking any more and saving the rest for seeds. The beans are just starting to be ready now, we’ve had half a dozen so far, but the plants are still covered in flowers and tiny 1″ long beans. This is the second attempt, as the first lot were killed by an unexpected late frost.
P1000424

Random tomatoes:
I had a buttload of tomatoes left over in the greenhouse so I planted them out, way too close together cos i didnt want to take up the whole salad bed, and I’ll just see what happens.
P1000423

Courgette/asparagus:
One courgette plant ‘black beauty’, is giving soooo many courgettes, we’ve had several meals from it already and it’s still going strong. The asparagus is a mix of stuff I grew from seed last year, with 3 crowns I put in in the spring. It seems to be doing very well now it’s covered to stop the cats getting on it, and I’m looking forward to next year when I should be able to get my first crop.
P1000427

Celery ‘victoria’. Never grown celery before so I don’t know if it’s on schedule size-wise, but it seems to be doing ok.
P1000429

Cauli/sprouts.
Romanesco cauliflowers/wellington sprouts. Not a very good picture as they are covered in an anti-butterfly screen. They are growing really well in there though, at the plot we ran out of fleece and grew half our caulis under fleece and half under net, and the ones under the fleece are so much bigger, so I’ll definitely be using that technique in future.
P1000430

Artichoke/squash/currants
The artichokes (green globe) are now established enough the cats aren’t trying to dig near them, and one is starting to flower. Currants are doing ok, no flowers or fruit yet, but they were only planted this year. Squash (1 butternut and 1 something else…rolet I think) didn’t work, no idea why, they just grew a bit, very slowly, then died, equally slowly. They probably hate my shitty clay soil.
P1000431
P1000432

And that’s pretty much it. Blueberries have been fruiting for months and are still going strong
P1000435

Strawberries have given a lot of fruit and have filled out the bed nicely…and if you look at the back of the pic you can see 38 more I’ve just planted from runners, which will go live at the plot once we’ve cleared space.
P1000436

I picked our november planted red onions ‘electric’ as the tops were starting to die back to nothing, we’ve had a few already, they taste good, just have to see how well they store now.
P1000441

And I picked the elephant garlic. Nom nom nom.
P1000445

We went to the plot the other day and stuff is generally doing well, but so are weeds, so we’re gonna go back one day this weekend. No doubt I’ll get tired after a few minutes of weeding, so I’ll do the same there and start making notes about what we grew, what worked out, and what got eaten by asshole slugs and squirrels.

May update

Not been doing a whole lot cos i’ve been ill and the weather has been crap, but it’s ok because the garden has been doing things all by itself. Here are a gazillion pics of all the things growing.

IMG_5144
cherry tree planted last autumn

IMG_5143
raspberries happy in their new bed

IMG_5142
Blackcurrants

IMG_5141
Globe artichokes

IMG_5140
Asparagus (and weeds!), most plants started from seed last year, plus 2 crowns planted this year

IMG_5139
Red onions and one elephant garlic

IMG_5138
Climbing (telephone) peas

IMG_5137
Rocket, carrots (just coming through) and radish

IMG_5136
2 of the blueberry bushes

IMG_5135
The one bit of the garden that actually looks pretty

IMG_5134
Crazy mixed leaves in the greenhouse. I need to eat more salad!

IMG_5133
Perennials to be planted out, weeds 🙁 and a tomato plant…moneymaker i think

IMG_5131
Sunflowers

IMG_5130
Silver birch has nice leaves on, and the lawn needs mowing badly.

IMG_5129
Acer and dragon lily

IMG_5127
Strawberries, from runners taken from my parents last autumn, and 2 honeyberries at the front waiting to climb the arch

greenhousemushrooms
We dug in some spent colonised straw and a bit of new straw into the soil in the greenhouse, and it worked! oyster mushrooms, yay!

IMG_5126
Kiwi plants

IMG_5125
more telephone peas, long overdue for planting out

IMG_5124
even more telephone peas, these are for the plot

IMG_5123
stocks and perennial cornflower

IMG_5122
‘trail of tears’ climbing french beans, and a few caulis hiding at the back

IMG_5121
Tomatoes (i think these are costoluto) and morning glory

IMG_5120
Dwarf french beans ‘saxa’ on the left, climbing beans ‘trail of tears’ centre and right

IMG_5119
Globe artichoke ‘green globe’ at the front, tomato ‘san marzano’ centre, 2 watermelons, 2 butternut squash and 1 aubergine at the back

IMG_5118
more telephone peas for the plot at the front, romanesco caulis in the middle, and one lonely morning glory at the back (the others are already in bigger pots)

IMG_5117
Giant pumpkin at the front, middle right is a tray of mixed squashes and 3 courgettes which haven’t germinated yet, back right is more romanesco caulis, left is asters and busy lizzies

IMG_5116
cucumbers! and in the prop are 2 types of cherry tomato, and aubergines

IMG_5115
french marigolds

mydiscovery
What I discovered behind the compost heap yesterday. Goddamn polly.

eggs
All cleaned up!

staging
I wanted greenhouse staging but couldn’t afford it, so this is the results of an afternoon’s work and some old timber I’d collected, plus a pallet that I couldn’t dismantle, but gren did it for me.

I got bored of pics at this point, but I also have indoors/in the other greenhouse sweet peppers, 3 or 4 types of chilli, physalis, passionflowers, 2 more types of tomato, asparagus, basil, oregano, swede, turnip, purple sprouting broccoli and 2 types of sweetcorn. And probably more things I’ve forgotten.

My week (and a bit more) in pictures

I just realised that I’ve done a gazillion things in the garden that I’ve meant to blog about and didn’t, so I’m just going to put it all in here in one ginormous update.

A while ago, Thompson & Morgan had a special offer of ‘buy 20 perennials for £10’, so i figured I’d go for it, as the flower beds have been rather neglected in favour of the veggie patch. Other than edible things, the only plants I care about in the garden are an acer, a corkscrew hazel, a couple of ferns, a honeysuckle, and a climbing rose. Oh, and something I don’t know the name of, and a couple of geraniums and other things my mum gave me that I dunno what they are called. Given that I have a reasonable amount of bed space, I figured 20 new plants would fill the gaps nicely and make the garden pretty and hopefully cover more ground and stop the weeds. The plants arrived the other day, and this is what I got.

IMG_4989

I looked at the names and descriptions, and realised I only knew what a few of them actually were, so GIS to the rescue. This is what they will turn out like! The only one I’m not sure what to do with is the red hot poker…they are a bit 1970’s for me, and they get biiiiig. I’ll either give it away, or hide it at the back somewhere.

perennials

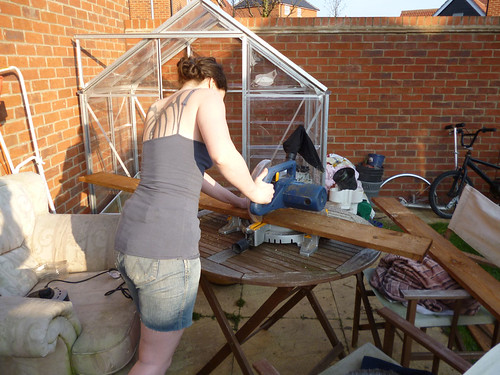
Theeeen (and this pic is from ages ago, but never mind), I’ve been playing with my new saw. A LOT. I love it so much, it makes jobs that I’d not have been able to manage in the past sooooo easy.

P1000384

On that occasion I built a raised bed for J’s greenhouse.

P1000385
P1000544

Then a couple of weeks later we built another bed for the side of my house to cover the sloping area.
P1000658

And he very kindly filled it with soil for me.
IMG_4992

Theeeeen last weekend, the internet was BAD. It was all ‘hey vampy, you know you want a conservatory but don’t have the gazillion pounds they cost? Well how about a secondhand lean-to greenhouse, you can pretend that is a conservatory, right?’. And I was all ‘DAMN YOU INTERNET, you know me too well!’. So I bought it, and after a rather scary (and possibly illegal) journey with bits of greenhouse sticking out the car window, we got it home, with the greenhouse, the car, and us, all in one piece. With Gren’s help, I got the frame up.

IMG_4985

Then I had to go buy timber to attach it to the wall, and my awesome woodyard also gave me some old flashing tape they had arrive damaged, cos I didn’t wanna pay £13 for 30m of the stuff when I only needed 4m. And with more gren help…there is wood attached to my house!

IMG_5007

And a greenhouse attached to the wood, and glass in the greenhouse!!
greenhouse

This is what I see when I open the back door. A pretty area to sit in, and a place for the seedlings that were previously taking over the dining room.
IMG_5013

And littlecat loooves it in there, cos it gets really warm and sunny in the evenings, and I love it in there cos YAY GREENHOUSE.

A while ago I decided I wanted an archway over the steps in the garden, so the honeysuckle and rose have something to climb up and don’t attack you when you walk past, and so I don’t have to cut them QUITE as far back every year. I asked the internet, and it was all ‘hahahaha, you can get one for £150 if you’re lucky, oh, but by the way, it won’t actually fit over your steps’. So I looked at timber on the B&Q website, and they wanted around £50 for it. So I asked my favourite local woodyard. £15 for the timber and screws. Score. AND I GET TO USE MY NEW SAW AGAIN WOOHOO. So I borrowed gren’s car cos it’s bigger than mine, and went and picked up the timber when I got the stuff for fixing the greenhouse to the wall. And I built an arch. And it took less than 2 hours, even including the gazillion breaks I need to take when I’m doing anything more strenuous than sitting down.

20120325_133811

Of course, I didn’t exactly consider that it needed to be 5′ wide to fit the gap, and I’m 5’3 tall, meaning my arm span is about 5’3 too. So there is no way I can move an archway that is 8′ tall and 5′ wide. But again, it was Gren to the rescue, we moved it into place, marked where the holes needed to be, and had some fun hitting a bit of wood with a sledgehammer to make the holes, then put the archway in place. And it fit! And it looked awesome! And it only cost £15!!!!

20120326_145936

And now for other random stuff. We moved the manky sofa off the patio so the greenhouse would fit. It really needs to go to the tip, but even with gren’s help I have trouble lifting it more than a few metres, and there’s no way we could get it in the car. We considered cutting it in half with a chainsaw, but that would be messy and I can’t really lift the chainsaw, and gren drinks too much beer to be able to safely operate dangerous tools, so we decided to leave it in front of the veggie area, as there’s a patch there that is always in the shade so not suitable for growing things in, and I had been considering putting seating there at some point, because I do like to be able to sit out of the sun.

20120324_125449

As you can see, I’ve put down anti-weed plastic around the area and started to cover it with gravel. I have another 2 bags of gravel that will be put down once a strong man moves them for me, then after that I’ll have to save up to get another ton or so delivered so the entire area can be gravelled, with a few paving stones for easy access to the greenhouse and chicken area.

I love my manky sofa though, it’s nice for relaxing on in the shade.
20120324_125554

And just perfect for taking myspace style photos (ok, so I took the tablet into the garden for the first time, and was having lots of fun internetting and taking stupid pics of myself).
20120324_125726

I also put in some bricks to mark the edge of the flower bed, and widened it a little so there’s room for my perennials, and planted some primroses and catmint my dad bought me. Mummycat looooves the catmint, and has been rolling around on it a lot…I made a little cage from chicken wire to cover it so she can’t completely kill it. I hope.

20120324_125410

Aaaaand that is pretty much all I’ve done since I last updated. The rest of the time I’ve been sleeeeping. Apparently my need to sleep 12 hours a day turns into a need to sleep for at least 15 hours a day when I’m being active. And I’m sure my body will have its revenge in a few weeks, but I’m trying to both make the most of the sun and not overdo things….I still have a huge list of garden stuff that needs to be done, so hopefully the good weather and my relatively ok body will last.

OH! and!!! J’s plot! We spent a few days down there a couple of weeks ago. It started like this:

P1000445

I did strimming and planting, and he did digging until it ended up like this:
P1000600

We found a flying spaghetti monster:
P1000488

And planned where we are going to plant ALL THE THINGS. The areas with grey backgrounds are already planted, the areas with white are just planned.

plotlayout