
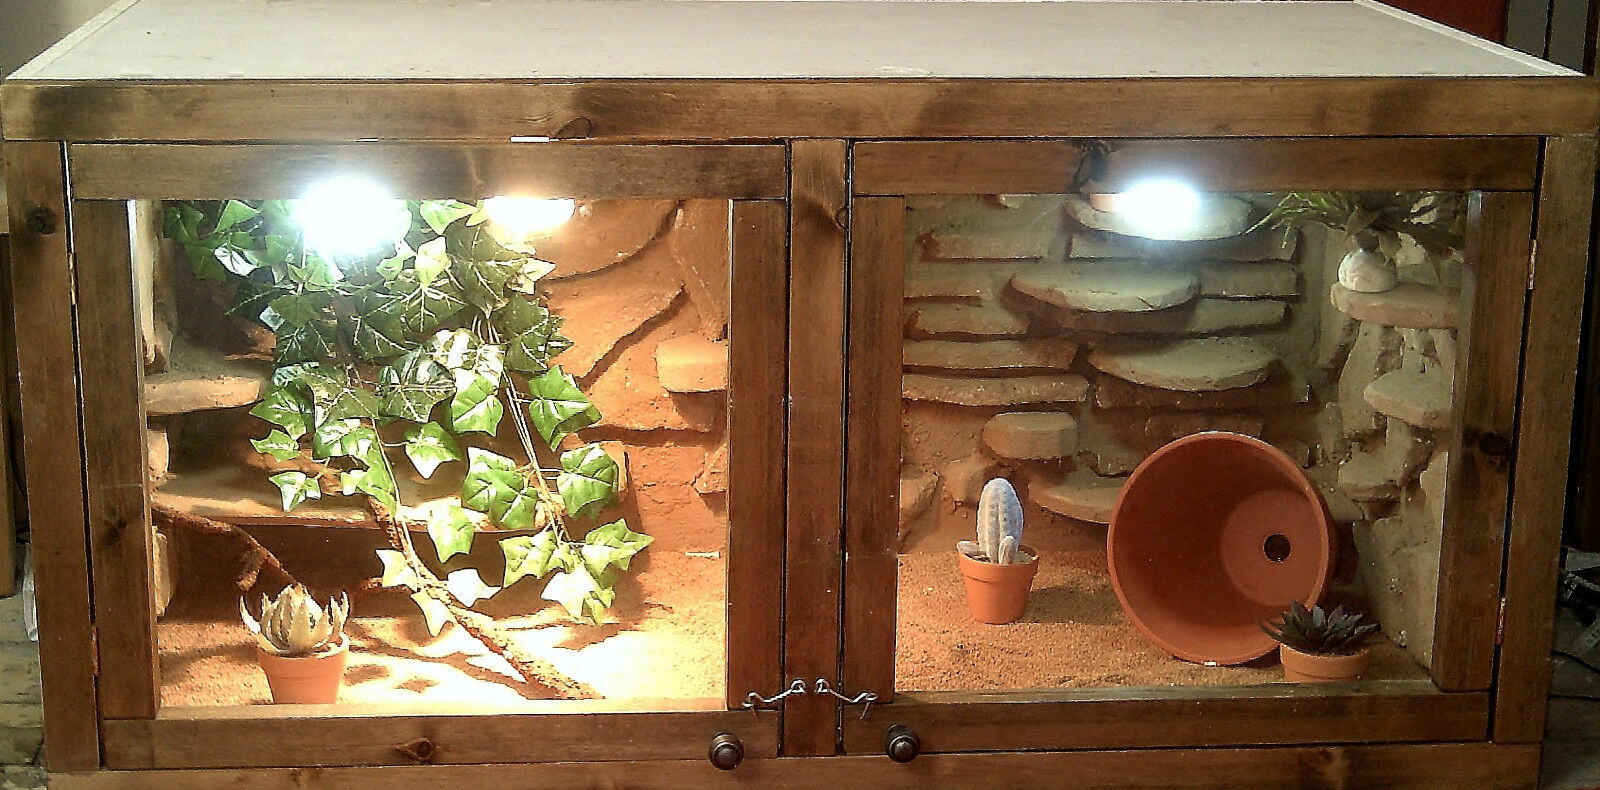
Currently all the babies (now 20! only one egg unhatched) are living in a small 2’6 vivarium. This is fine for them at the moment, means they don’t have far to go to get to their food/cool spot/basking spot. However when they are adults, they’ll need something bigger. Gren and I decided we’d look for a secondhand viv to house the two we are keeping, figuring we’d manage to get something within the next couple of months that was in our budget. As it was, I found this on ebay. 4ft viv with UV tube, ceramic heater, and 2 lightbulb fittings, and a cabinet to keep all the bits in (and raise it out of cats-eye-view) for £66.50. Score.

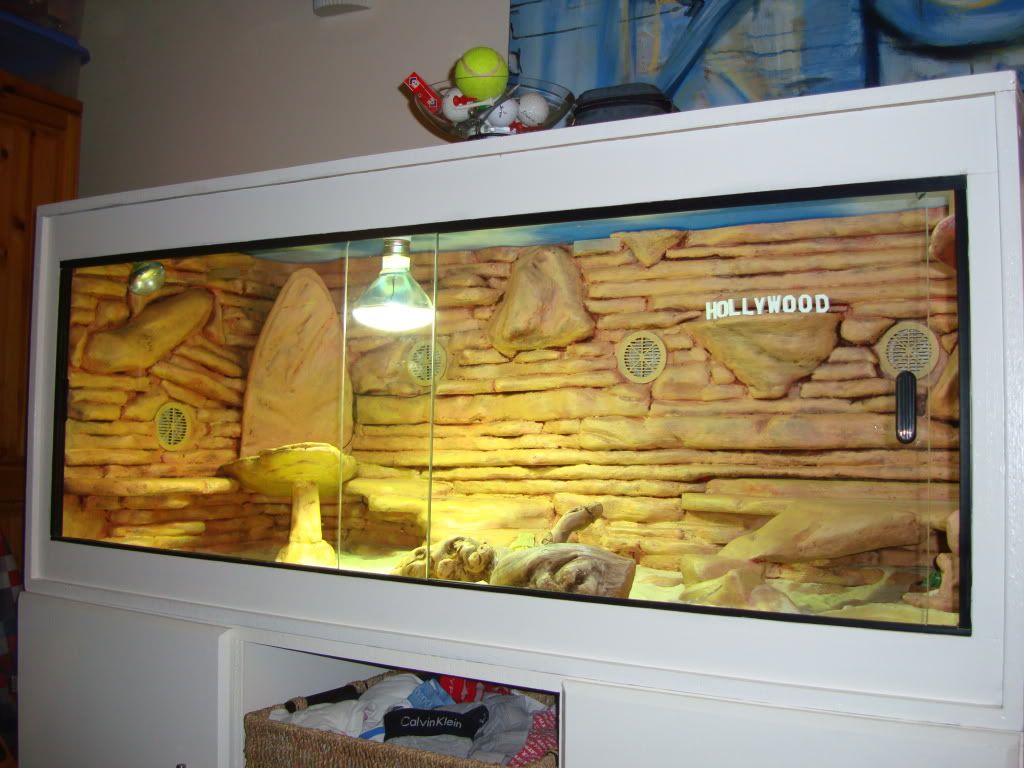
During my ebay hunting, I found this wonderful creation.
If you have £279 burning a hole in your pocket, you can buy it here. However, with the £50+ it would take to get the UV and other light fittings, that was just sooo far out of our budget. But it’s so prettttty.
So I figured if that sort of thing is makeable, then goddamnit I can make it. I asked the internet how to make fake rocks for vivariums, and came up with all sorts of complicated stuff involving chicken wire and cement and soaking the end result in water for weeks to make the cement lizard-safe. And then thought ‘fuck that, I’d rather just make it out of polystyrene’. After a little more googling, it appeared that many people have done exactly that, including this awesome creation, which sadly I can’t credit as I can’t remember the forum I found the link on.
So I went to b&q, hoping to buy some of their small 25mm thick polystyrene sheets. However, the website lied to me, and they were out of stock of the small sheets, so I ended up buying a sheet that is 2.4m long and 1.2 metres wide. Awesome. The inside of my car however is smaller than 2.4×1.2m. So I had fun in the carpark breaking this enormous thing into 3 pieces that I could actually transport home.
I decided to put my skillz to the test and make a little climby basky thing the babies can use in their current viv to iron out any problems I have with the creation process before starting on the real thing. As I expected, while cutting this polystyrene with a stanley knife is easier than cutting the box I made the incubator out of, it’s still a pain in the ass, so I ordered a hot wire cutter to do the job much more neatly and easily. I also learned that b&q own brand PVA glue is a pile of crap. I dunno if I got a bad bottle or what, but the consistency was more like water than glue, even after vigorous shaking and stirring. So I cut my shapes out, used a combination of the crappy glue and cocktail sticks to hold the whole thing together, then covered with a layer of grout, then another later in the evening when that had dried, and I’ve just started on painting it, using acrylic paints, the plan being to use lighter shades of grey for each coat.
It clearly looks like rock, as the intelligent auto function on my camera decided it was a landscape!
After grouting

After a coat of black paint

first grey coat

Total cost of this insane project so far:
Vivarium: £66.50
Polystyrene sheet: £6.98
Crappy glue: £3.50
Paintbrushes for grout: £3
Grout: £0 (the builders left a huge bag behind when they did my kitchen, woohoo!)
Hot wire cutter: £15.19
Paint: £7.34
Mirrors: £3.97
Total: £106.48
I’ll need to buy something to seal it with, either varnish or resin, I’ve not decided, and I may well need to buy more paint, and I’d like a circular thermometer I can incorporate into my planned design, but I think all the other bits I’m thinking of I can either make from the polystyrene or can salvage from things I already have, so fingers crossed it won’t cost me too much more.
So far my only ‘plans’ for the design are drawn really badly in a sketchbook, so you’ll just have to wait and see how it turns out and hope I remember to blog about it while it’s still a WIP.