Facing my fears – Ginger Jeans!

I do not like sewing very much. I think about sewing, and my brain image is of me sitting at a sewing machine stitching, and I think ‘oh that’s not so bad, I like that!’. This is true. However I always forget that this accounts for only about 20% of sewing. The rest is ironing and pinning and cutting and playing furniture tetris because my room isn’t quiiite large enough for the table fully extended and the ironing board and space to easily move between them, and I find this part physically exhausting and quite boring, there’s too much stopping and starting to get into a good rhythm with it.

However, this time I am going to persevere with it, as I want some jeans. I find jeans very hard to buy as I have a 12″ difference between my hip and waist measurements, so I end up eventually finding a pair of jeans to fit my hips (which could be anywhere between a size 8 and a 14 depending on brand and cut) and having to ignore the fact that they are too big at the waist and gape horribly at the back.

I’ve been aware recently of the internet hype over Ginger Jeans (well, as much as there CAN be hype over a sewing pattern) and decided to give them a try. The pattern is fairly expensive, but it is SO worth it, and for relative sewing noobs like me it’s a perfect pattern to try as it was also done as a sew-along on the authors blog, so there are extra hints, tips, and photos for bits that are harder to figure out.

I am making the size 12 to fit my hips, and took a couple of inches out of the waistband in two darts before cutting the pattern, and also did a full seat adjustment as explained in the blog post to add extra butt space and hopefully stop the back waistband pulling down when I sit. I added about a centimetre to the back seam, though from having quickly basted and tried them on, I think next time I’ll add two.

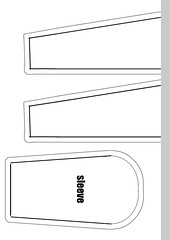
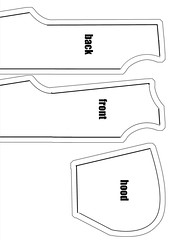
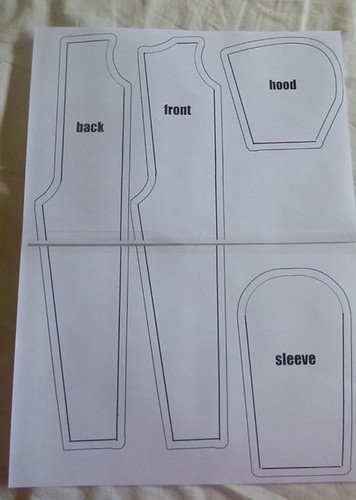
While waiting for my fabric to dry I cut and taped the pattern together, then it was time for cutting!

P1080281

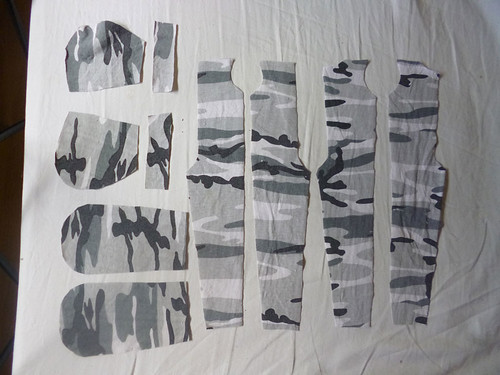
The pattern said I would need 2.1m of 60″ fabric for my size. I was only able to buy in 1m increments, so I had to get 3m. On examining it, due to the fact that I’m not making the largest size and the fact that my fabric is actually 62″ wide, I realised I could amend the cutting layout so I can actually get two pairs from the fabric I have. Score.

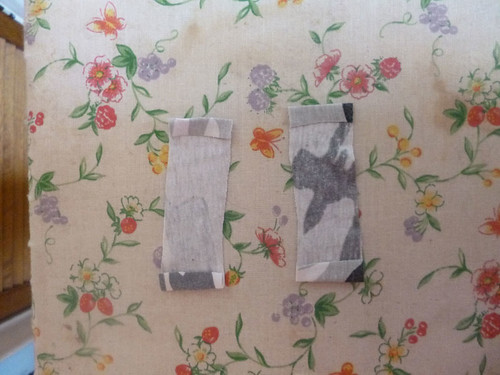
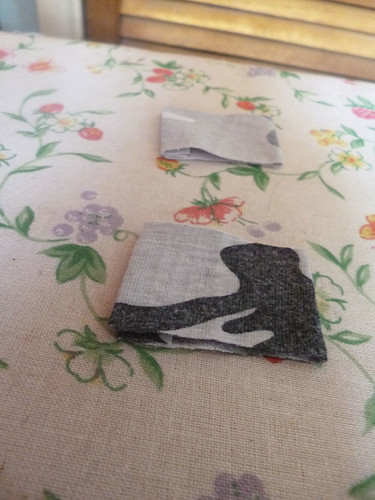
I cut all the denim, interfacing, and lining. I picked a pretty pink and blue fat quarter for the pocket linings as although they won’t be visible when worn, it looks fun as I am putting them on.

P1080284

The process took longer than anticipated as I had to stop many times to remove the cat from the fabric, or from the ironing board, or from my chair, as well as having to take lots of breaks to stop myself getting too tired. Here is my helper helpfully holding down my pattern instructions so they don’t get lost.

P1080285

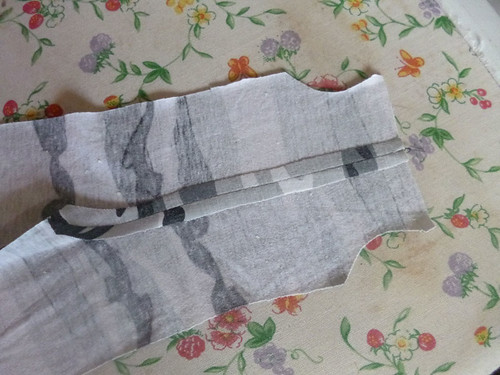
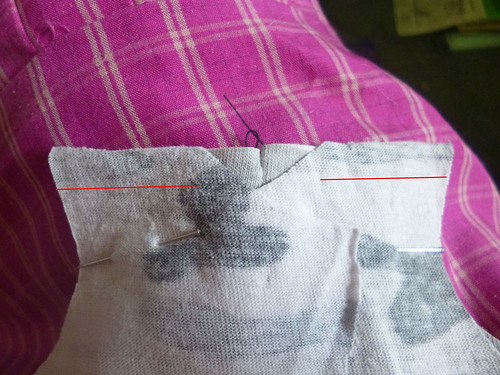
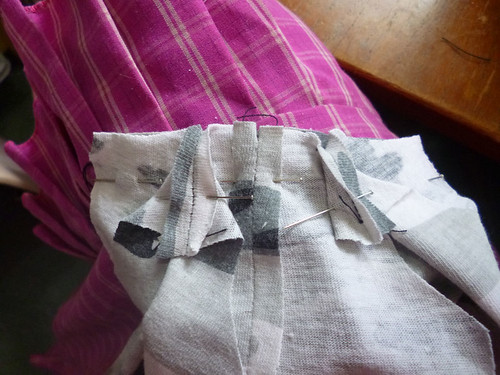
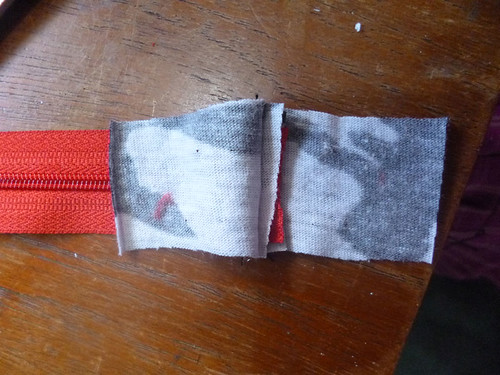
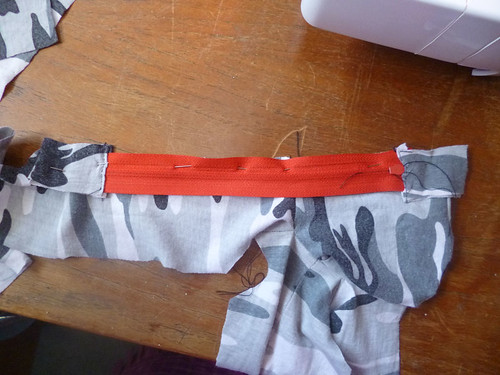
And here’s what I’ve got so far…pockets! It’s the first time I’ve done topstitching with a thicker contrasting thread, and the first time I’ve used my serger for curved seams, but it’s going okay so far without any major disasters.

P1080287

P1080292

The topstitching could be neater, especially around curves, but I’m sure I’ll improve with practice, and a few wonky seams are worth it to have jeans that actually fit me!

MSD onesie pattern

Yeah, so I am a baaad blogger. But rather than rectify that by talking about all the things I’ve done in the months since my last post, I’m just gonna forget about it and get on with explaining how to make a onesie for a MSD (42cmish) BJD. My doll is a ‘vivi’ by Xinmeng, purchased from Mirodoll.

IMG_6138 IMG_6140

This pattern isn’t for complete beginners. Not really because it’s hard, although there are a couple of slightly fiddly curved seams, and putting in a zipper needs a bit of practice if you’re not done it before, but mostly because I have never written a pattern before and don’t really know what I’m doing, so a bit of background sewing knowledge will be helpful so you can understand what I’m talking about!

Things you will need:

Old t-shirt, or similar fabric
Matching thread
Zipper long enough to reach from your dolls crotch to an inch or so above the top of her head (longer is fine, it is trimmed to fit) I believe I used a 10″ zip
Pins
Sewing machine with regular and zipper foot
Iron

Pattern notes:

The pattern is made to be sewn on a machine, so there is a 1/4″ seam allowance, you can reduce this if you’d prefer to hand sew. The outer line on the pattern is the one you should cut around, the inner line is the size of the piece without seam allowance, if you’d prefer to draw your own. Due to the software I used to make it, the edges are rounded, you don’t need to cut them like this, square corners are fine.

Unless otherwise specified, all seams are to be sewn with right sides facing, and pressed open.

The pattern covers two sheets of A4 size paper. If you live in a country where other sizes are standard, then print it at 100% and allow cropping, hopefully nothing useful will be cropped!

Get the pattern by clicking on each of the two below images, then click more actions > download/all sizes and choose the ‘original’ size.

pattern2 pattern1

Instructions

Print out the pattern, and tape it together, making sure the lines for the legs match up

P1050503

Roughly cut out the pattern pieces and lay them out on your ironed t-shirt. If you are using fabric, then fold it half, each pattern piece is meant to make two symmetrical pieces. Cut another pattern piece that is a little wider than your zipper, and 4″ long.

P1050505

Pin your pattern pieces to the t-shirt, and cut them out, cutting through both layers of fabric. You will end up with 10 pieces, 2 backs, 2 fronts, 2 hoods, 2 sleeves, and 2 zipper tabs.

P1050507

With right sides facing, pin the two hood pieces together, and sew around the curved top/back seam.

With right sides facing, pin the two back pieces together, and sew along the seam from the crotch to the top of the neck.

Press seams open. It’s a bit fiddly to do the inside of the hood, but as long as the top and back part are flattened, the middle doesn’t matter too much.

P1050508

Pin the front pieces to the joined back, and sew along the shoulder seams. The lines you should sew are marked below.

P1050510

After ironing these seams flat, pin the hood into place. Line up the centre hood seam with the centre back seam, and pin in place around to the front. Make sure you pin the shoulder seams flat. Sew this seam.

P1050511

You should now have a crazy robe looking thing!

P1050512

Take your zipper, and cut off the bottom, just below the stopper

P1050513

Line up the zipper with your onesie, starting at the crotch, and cut off the top level with the top of the hood (I actually cut mine a bit shorter, but if I did it again I’d err on the side of longer so the zip comes closer to the top of the hood)

P1050515

Take your zipper tabs and fold over 1/4″ on each end, and iron.

P1050516

Fold them in half, and iron again

P1050517

Put the zipper inside the tab, half an inch or so deep, pin, and sew across to attach the zipper to the tab. I forgot to take a photo of this, but it’s relatively simple. When this is done, cut across the fold line at the bottom, open it up, and trim the end of the zipper.

P1050519

Repeat for the top of the zipper, you will have to do this with the zip open to stop the pull getting in the way of the sewing machine foot, so make sure you pin carefully.

With the right side of the zip facing the right side of one front, making sure the zip is the right way up, pin in place, deciding how much tab you want at the top and bottom (excess can be trimmed after sewing).

P1050520

Using a needle and waste thread, baste the zipper in place (some people can get away without this step, and sew a zip in that is just pinned in place. I am not one of those people)

P1050521

Put the zipper foot on your machine, and sew the zip in. Start with the zip in one position, then stop half way through (leave the needle in the fabric and lift the foot) and slide the pull past, so it doesn’t get in the way. When you sew the tab on each end, sew a diagonal line from the line of the zipper stitching to the edge (so a triangle will be visible on the front when finished).

Repeat for the other size of the zipper.

Press, and top stitch all the way round the zip.

P1050523

Put the regular foot back on your machine, and prepare to sew the arms. Pinning them is a little fiddly, so just take your time

P1050524

When both sleeves are sewn in, fold over the ends of each arm and leg 1/4″, iron into place, and sew

P1050525

From here, I got so excited to be on the home straight, I forgot to take any more photos. It’s pretty simple though.

Make sure your zipper is open, or you won’t be able to turn it the right way out at the end!

Line up all the edges, pin, and sew. There are three seams: wrist to ankle on each side, and the inside legs . Nothing complicated here, just nice straight lines.

When you’re done, turn it inside out and give it a quick press, then try it on your doll!

IMG_6126IMG_6124IMG_6128

I did it!

Quilt top is finished, with considerably more cat interference. but it’s ok, cos it’s doooone. There are a few mistakes, the piecing errors are due to me changing my mind on the design half way through making it, and the sewing errors are because, well, i can’t sew. But it mostly all lines up, and i’m really happy with it, to the extent that i look at it and can’t actually believe that I made it.

Now to learn how to quilt and bind and all that other fun stuff.

quiltfinished

Crazy hour. It’s like happy hour with no booze required.

I really really should have remembered. Every evening at around 9 is crazy hour in my house. British summer time only started yesterday, so i guess their internal clocks were still a little off. It mostly involves the cats tearing round the living room trying to break the sound barrier and destroying everything in their way. Often it involves one of them ‘hiding’ under the throw over the sofa and being attacked by another. It is generally amusing.

Tonight, it was less so. I finally got round to working on my quilt again, and after sewing a few bits together today, I had a nap, then decided to press them ready for the next joining stage, and lay them out so I could see how big it was going to be and work out whether i was going to sew them together as planned, or change it up a little.

It was going pretty well, all the pieces were laid out, so I decided to get the camera. At some point between walking upstairs to fetch the camera, crazy hour began. I came downstairs to find this:

argh3

argh1

I must say it was only babycat and mummycat involved this time, Snargle has been asleep on top of my wardrobe for at least 4 hours. I think she is saving up her energy for a 4am mountaineering expedition across my desk. After the crazy cat train made its way noisily upstairs, I thought I was safe to start again. I was wrong. I got half way through before they reappeared and trashed everything again.

BUT I WON. Because, as yet, cats are unable to get inside my photoshop.

option1

option2

option3

option4

Now I just have to decide which of these layouts, if any, I want to use. The pros of the last two are that it’ll probably make it large enough to cover my bed without me needing to cut more strips to make into yet more squares, and it makes it less eye-searing to look at. The cons are that I will need to buy more fabric (not a huge issue as i need to go to the shop for more thread tomorrow anyway), and i’ll have to figure out whatever magic method is used to sew long strips between panels.

Dear sewing machine. suck it. love vampy

As I have the memory span of a goldfish, I decided I wanted to make some dresses. I KNOW I am shit at sewing, but somehow a combination of forgetting how much I whined last time, desire to have pretty dresses, and pretty much complete denial that there is something I am useless at allowed me to think I can make myself a dress.

I bought this dress a while ago, and I LOVE it. But I don’t really like the fact that it’s a halterneck, and the net is itchy. A sensible plan would have been to make an underskirt and deal with the halterneck, but well, that was sensible, so instead i decided I will make a similar dress based on this shape but with real straps and no net….and if i do make a petticoat for it to add volume, it’ll be from non-itchy net.

newdress

I bought pretty fabric with blueberries on, partly cos it was pretty, and partly cos it was cheap. I forgot to photograph it though, but well, it has blueberries on, use your imagination. Ok, someone on rav asked for a pic, so i guess you get to see it too. Here, blueberries.

blueberries

Being a cheapass with a strange body shape, I gave up fairly fast on the idea of finding a pattern that would do what I want (seriously ebay, fucking £15 for a vintage pattern, REALLY??)…I may consider spending that on a pattern that I knew would actually fit me, but seeing as I’d have to adjust it in lots of places, £15 can fuck right off. Hell, that’s more than the fabric cost.

So I sat on my living room floor with a couple of dresses for inspiration, and approximately 12 miles of muslin. I did some tracing and highly technical drawing in biro, then a bit of cutting and pinning, finally I actually did some damn sewing, and I came up with this:

icansew

After a contemplative nap, i realised i didn’t like those straps, so i took it apart and redid it, and came up with this:

icansew2

It looks a little crappy cos it’s big on the ribcage and the straps are too long, but on the real thing i will actually measure and fix the straps myself rather than getting gren to do it, and the back will be smocked or shirred or whatever the correct technical term is for ‘made elasticy so it fits without me needing to subject myself to the trauma of trying to sew in a zip’. I am hoping that this, and the use of a fabric that is considerably heavier than muslin will mean that the real thing will fit better and look better. At the very least, at least my nipples won’t be visible through it.

I have defeated you in round one of this battle sewing machine, please play nice tomorrow when i begin work on the real thing. Thank you.

little bunny foo foo

I can’t sew. Imagine if a monkey were given a sewing machine. I’m not that bad. But like, if it were a genuis monkey who’d spent its life working in a sweatshop in order to feed its monkey babies..it would probably be better at sewing than me.

But but but i can knit. and i can seam knitted garments AWESOMELY. and i can do spinning and felting and dyeing and anything else related to yarn and fibre. So sometimes I forget that I CAN’T FUCKING SEW.

A couple of years ago, Nik asked me to make him a little bunny foo foo outfit for his lenore doll. I agreed, and bought the fabric and looked at it and stroked it and procrastinated, then i put it in a box. It’s Nik’s birthday soon, and he is the hardest person on the planet to buy for, as he buys every single thing he wants (and lots of things he doesn’t want), and somehow crams them into his 2 bedroom house in boxes and boxes lining the walls. I try to avoid adding to his mole-man-ness, as when he runs out of space things mysteriously appear at my house. He was getting rid of some garden stuff a few weeks ago, I asked if he had a hoe (and not JUST because the name amuses me). I am now the proud owner of 2 hoes, a spade that is different to the 2 spades i already own but i forget how, 3 garden tables, and a green trolley thing on wheels that i think is meant for planting grass seed or fertilising the lawn or some shit. So when he said he didnt know what he wanted for his birthday, and i didnt know what i could get him that would be useful, appreciated, and not mean that something else from his house had to come live with me, I decided i would make this outfit.

I can kinda sew from a pattern, but obviously there is a gap in the market when it comes to patterns for bunny outfits for dolls with vastly oversized heads. Then i had the dilemma of whether to make the costume from the comic book or the one from the animation. In the end i chose the latter cos there are better pics of it on the internet, and the comic book one would have needed a giant oversized zip that is probably not something that has been invented yet.

So over the last few days I’ve been drawing and cutting and making templates out of muslin and sewing and sticking pins into my hand and whining. I have NO idea what was going through my head when i picked the fabric. I can only assume it was ‘wow, this is cute and soft and the right colour pink and it’ll make an awesome bunny outfit and doesn’t cost a gazillion pounds a metre’. The fact that I’d have to SEW it was clearly not at the front of my mind, cos it was horrible. It’s some sort of fleecey stuff but not really fleece and it’s stretchy and really thick and i couldnt do 1/4″ seam allowances cos it all bunched up under the presser foot and wahhhhhh. Oh, and making the ears stand up and not be all floppy. NIGHTMARE.

BUT, tonight i finished it. Vampy 1, sewing 0

lenore

oh noes, another timesuck!

A couple of weeks ago I had to go into town to go to the bank, so we popped into a couple of charity shops nearby to look at books, and i found a really good quilting book for £1.50. I’ve always wanted to try quilting, but i’m pretty rubbish at sewing, so the thought of sewing together all those little pieces scared me. Then i had a revelation….you don’t HAVE to cut out a gazillion squares the way my mum used to, you can just sew strips together and THEN cut them up. I figured I can manage that, even with my limited skills. So I got some of my fabric stash out (yes, even though i am crap at sewing, i still somehow have a fabric stash), and made a quilt. I carded up some merino and alpaca to use as the batting, and it’s really warm. Okay, so it’s pretty ugly and has lots of mistakes in, but it worked! and only took a few hours work!!

So now i’m planning my next one, and rather than try to work out what the hell i was going to do from stuff scrawled on scraps of paper, I decided I’d write it here. I was planning to make something from my book, but the patterns were either very twee and ugly, or needed varying amounts of lots of different fabrics, which I didn’t have. So i went to the sewing shop and shopped in the bargain bin. I got one metre each of 6 different fabrics, so I had to figure out how to use them in a way that uses them all in equal amounts, and isn’t too complicated. After lots of internet browsing, I gave up, and got out photoshop, and this is what i came up with.

(yes i know the pieces don’t line up, it was a quick sketch and i was lazy)

Soo, what i need to do is sew equal amounts of 4 different sets of stips..123, 145, 623, and 645, then cut these into squares…then gather together the different bits, rotate some of them, and sew into bigger squares. Square A will be 2*123 and 2*145, square B will be 2*623 and 2*645, then piece them ABABA and sew. Sounds easy!! I’ve not decided on the size of the strips/squares yet, and i dunno how big the final thing will end up, but the plan is coming together slowly

Maybe once I’ve finished it and actually have a clue how to write a quilt pattern, i may write it up, but for now, these notes are enough to help me figure out what i need to do